Guide · Saxophone pads
How much does it cost to get new pads on a saxophone?
If you would like a better sense of what it might cost to replace the pads on your particular saxophone, or you simply want to learn more about the process itself, I go through the factors that affect the price here.
Let me start with two specific price examples of what it can cost to get new pads on a saxophone:
You only need to replace the top octave pad on an otherwise almost new and flawless alto saxophone. The pad was bought cheaply on Temu, and you do all the work yourself.
A professional saxophone repairer replaces all the pads (a “repad”) on a really old and worn baritone saxophone. At the same time the instrument needs extensive adjustment for the pads to work properly at all, and you choose some of the most expensive pads and resonators on the market.
The examples are of course rather extreme, and most real pad replacements fall somewhere far between these two extremes.
Even so, the two examples contain much of the key information about the factors that affect the price, and show that the difference can be enormous.
The aim of this article is to give readers a better idea of what it costs to replace the pads on their particular saxophone, and which steps the process involves.
How much do the pads cost?
The price of the pads themselves depends mainly on three things:
1. Number and size
It almost goes without saying that the more pads that need replacing, the more expensive it gets. That does not necessarily mean that replacing three pads costs three times as much as replacing one. Many of the saxophone’s keys are linked together, and several keys often need adjusting after a pad change, regardless of whether one or three pads in the same linkage have been replaced. The price per pad can therefore in some cases be lower the more pads are replaced.
Besides the number, the size of the pads also has a significant effect on the price.
A saxophone typically has around 23–25 pads, depending on model and construction. A soprano, alto, tenor and baritone saxophone can have roughly the same number of pads, but there can be a very big difference in size – and therefore also in the cost of materials.
One of the smallest pads on a saxophone can be around 7–9 mm in diameter, while the largest pads on a modern baritone saxophone can be around 65–70 mm.
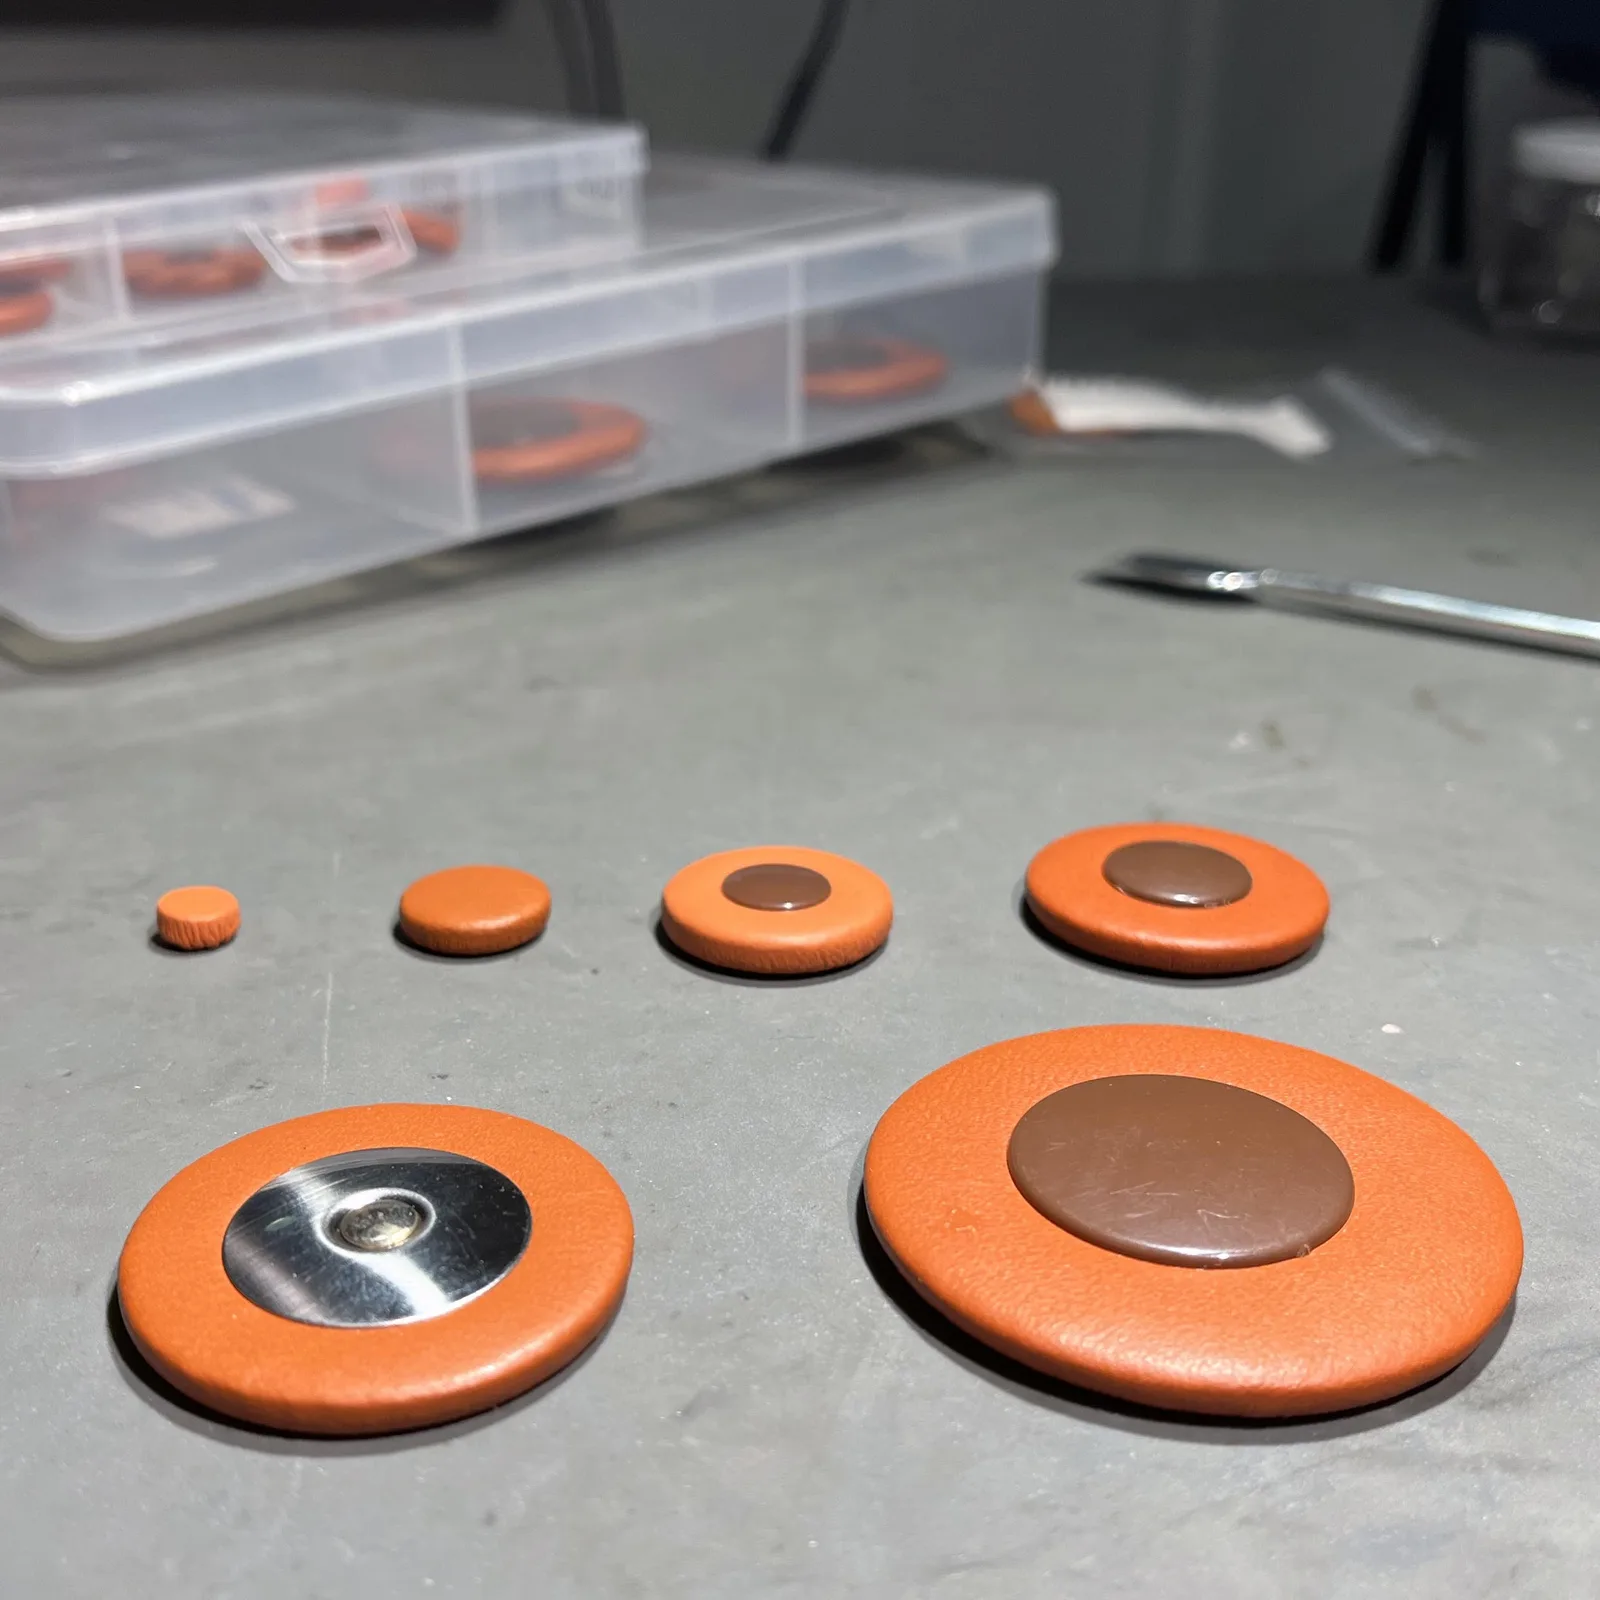
If you choose a sensible quality pad within the same brand, 7–9 mm pads can cost around DKK 15 each, while 65–70 mm pads cost around DKK 100 each. The price can of course vary quite a bit depending on materials and quality.
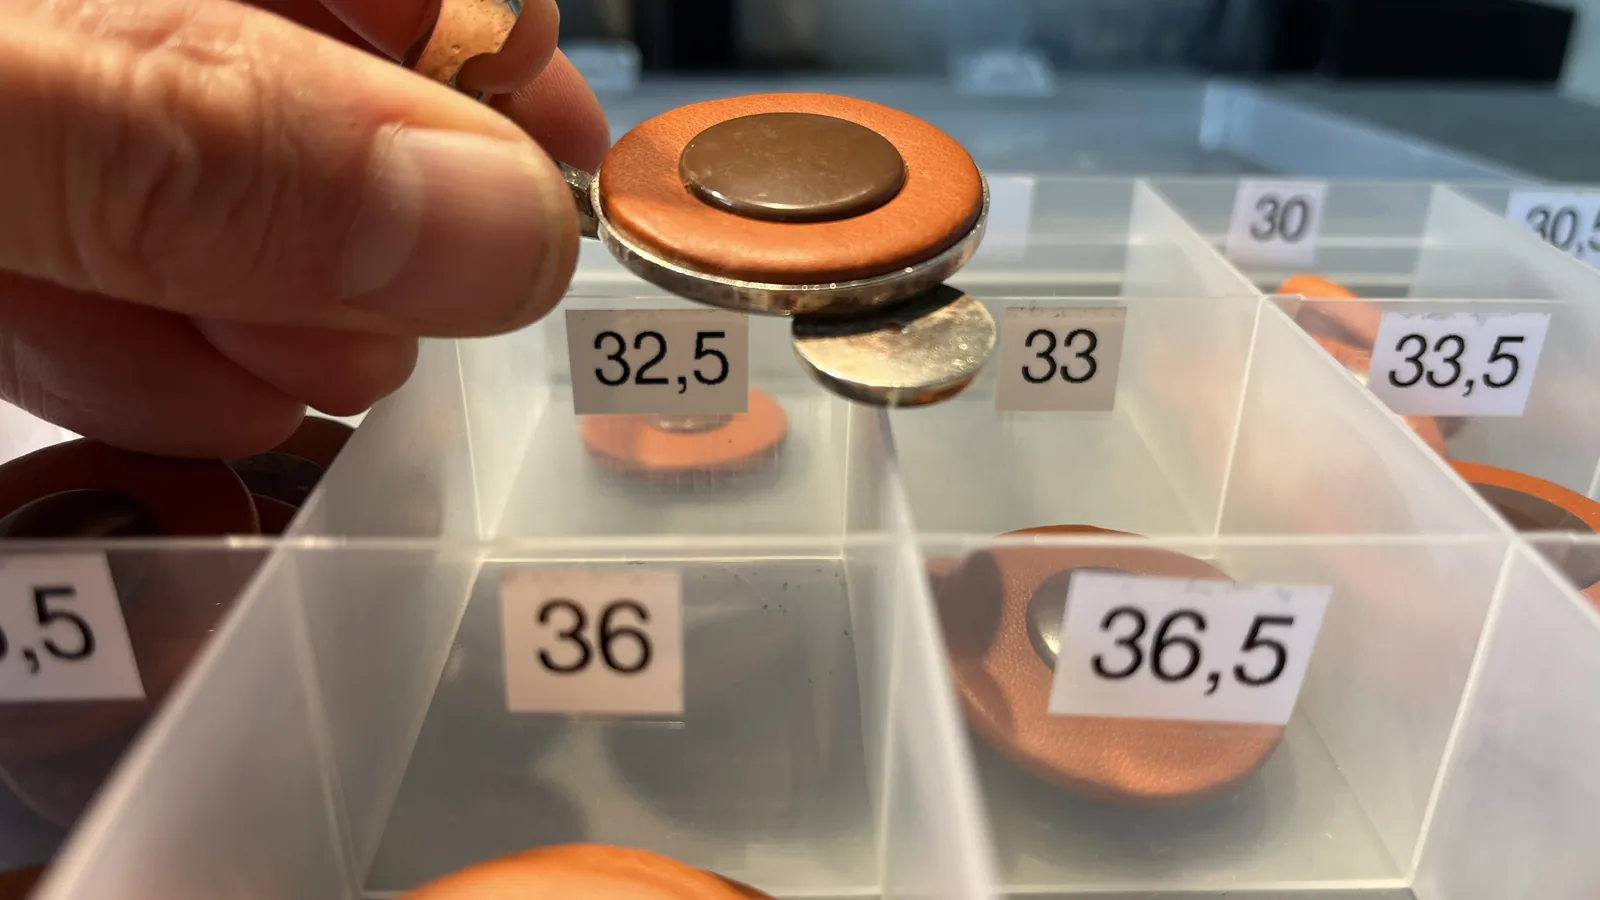
Pads are typically available in half-millimetre increments. This is necessary to be able to choose a pad that fits very precisely in the pad cup it is going into. Pad sizes vary from brand to brand and from model to model. A set of pads for a Yamaha will most likely not fit a Selmer saxophone.
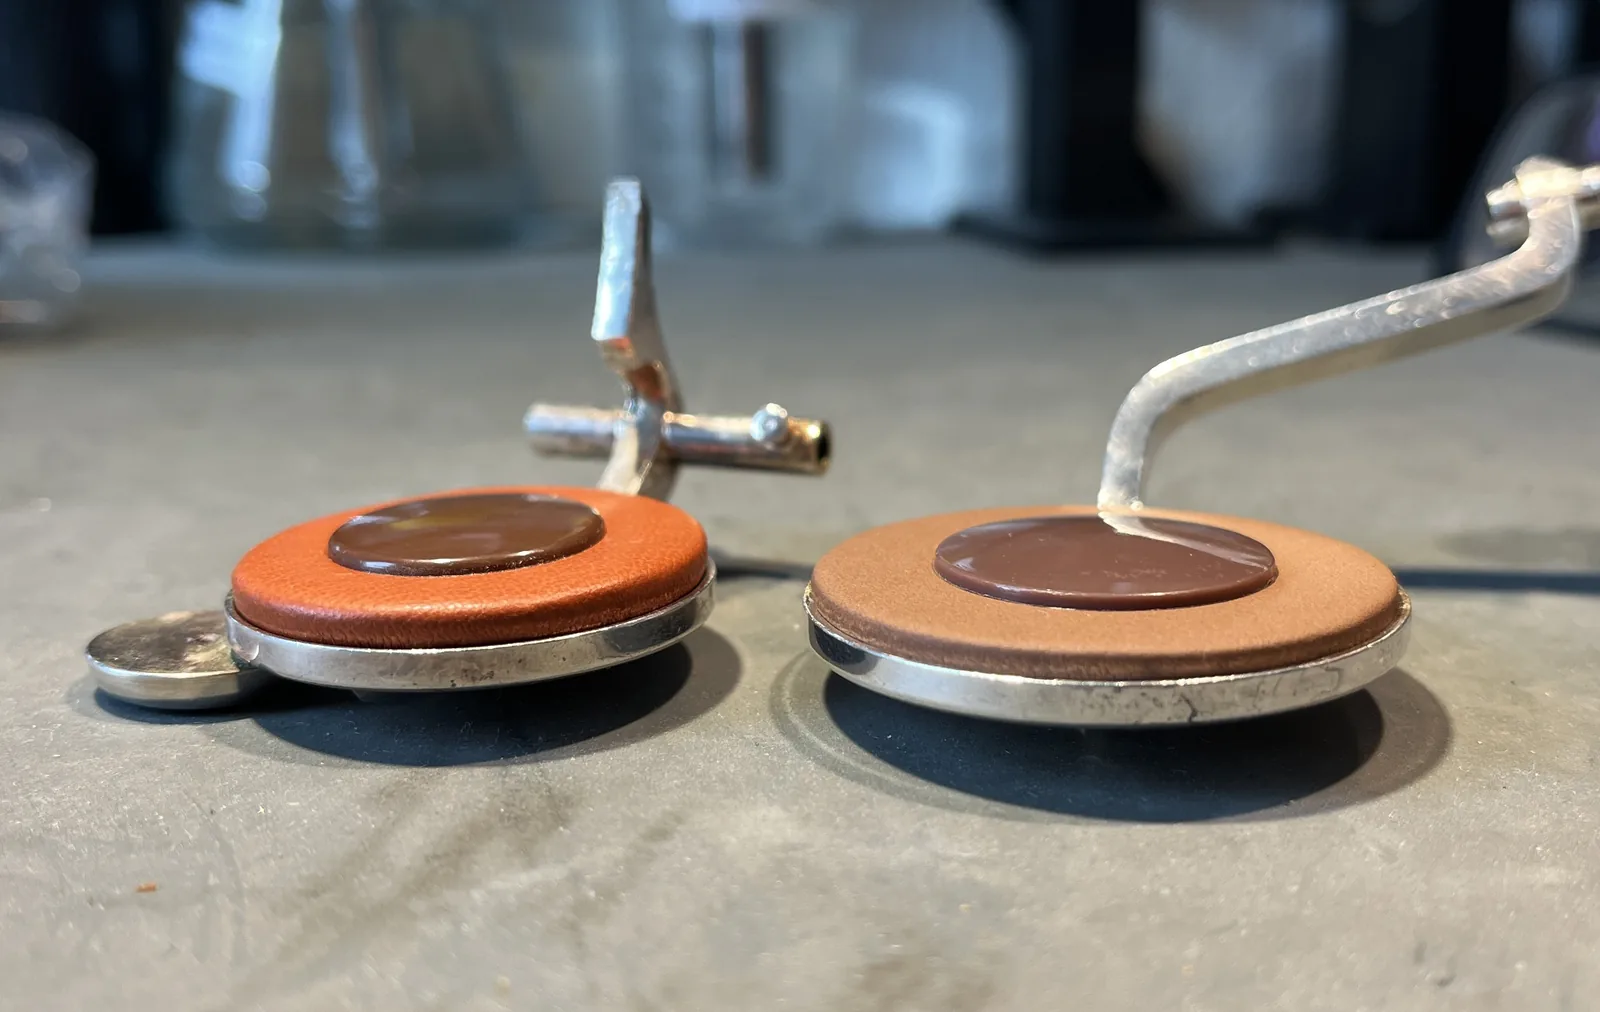
In addition, pads can differ in thickness. Even if a pad has the correct diameter, the thickness can be wrong, which can make it difficult or completely impossible to get it to close properly. Pad thickness itself rarely has a big effect on the price, but there can be cases where you have to choose a particular kind of pad from a particular supplier, simply because not all pad makers offer all thicknesses.
2. Materials and quality
Most traditional saxophone pads consist of a felt core covered with leather and mounted on a firm backing. In the middle there is often a resonator made of plastic or metal. The resonator helps give the pad a firm surface and also affects how the sound is reflected inside the instrument.
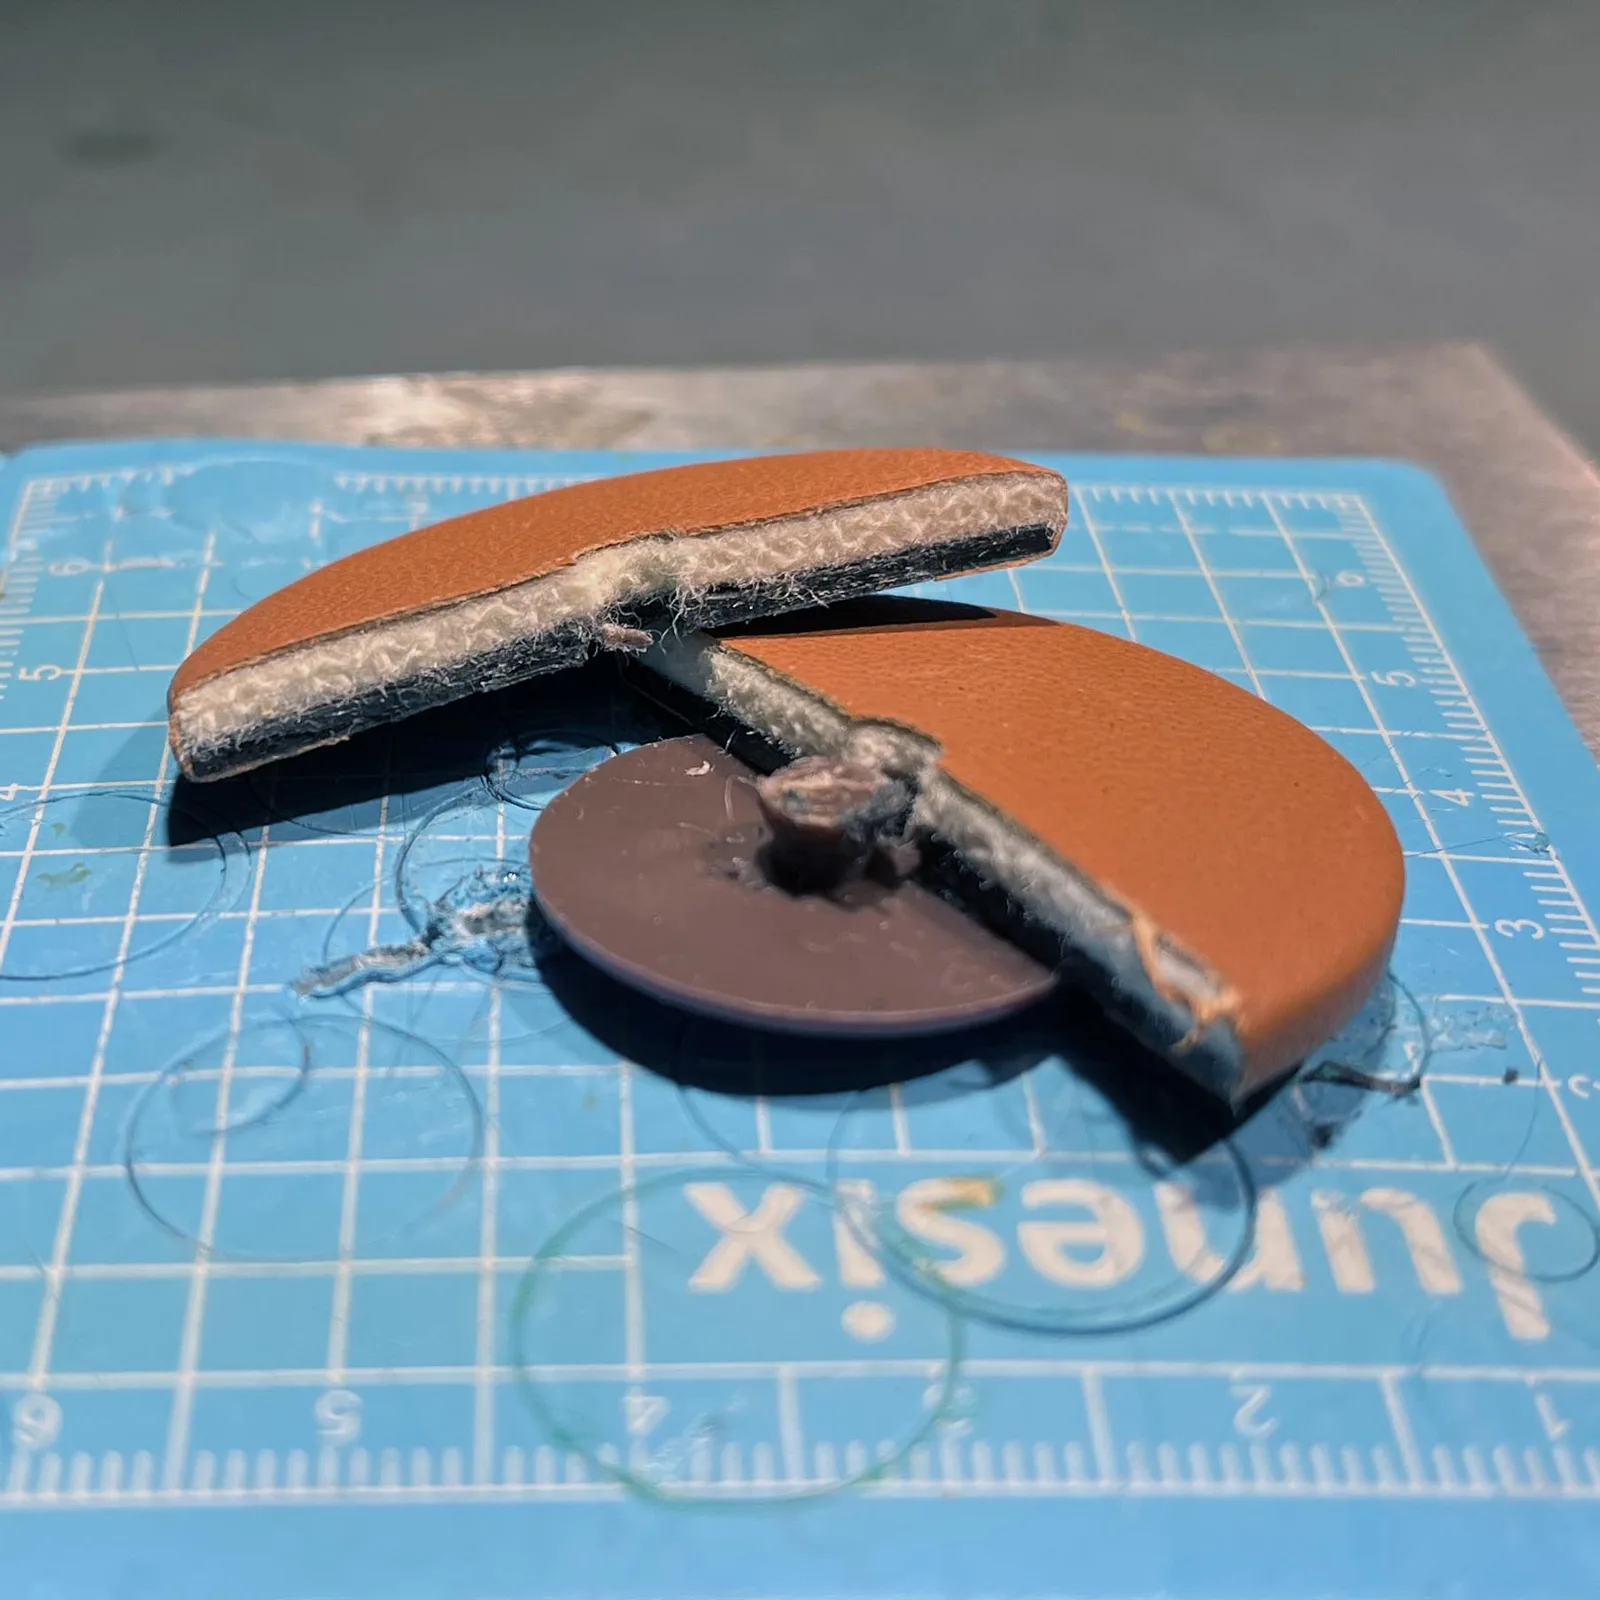
A cheap pad can work perfectly well, but with more expensive pads you often pay for more consistent materials and a more precise construction. This can for example be:
- More consistent and supple leather
- Felt with more consistent firmness
- Better dimensional stability
- More precise thickness from pad to pad
- Better resistance to moisture and deformation
Why the material matters
This matters because a saxophone pad must be able to seal completely against the tone hole. If the felt is uneven, the leather is poorly stretched or the pad changes shape over time, it becomes harder to achieve a stable seal.
The leather is typically thin, tanned lambskin or sheepskin, but some premium pads are made of, for example, kangaroo leather, which is very strong for its thickness and can be made with a very smooth surface. Other pads use various synthetic materials or special inserts intended to make them more stable or more resistant to moisture.
However, this does not necessarily mean that the most expensive pad is always the best solution. A good pad must first and foremost suit the instrument’s construction and the way the repairer works. A fairly ordinary quality pad that is correctly fitted and adjusted will often work better than a very expensive pad that has not been fitted properly.
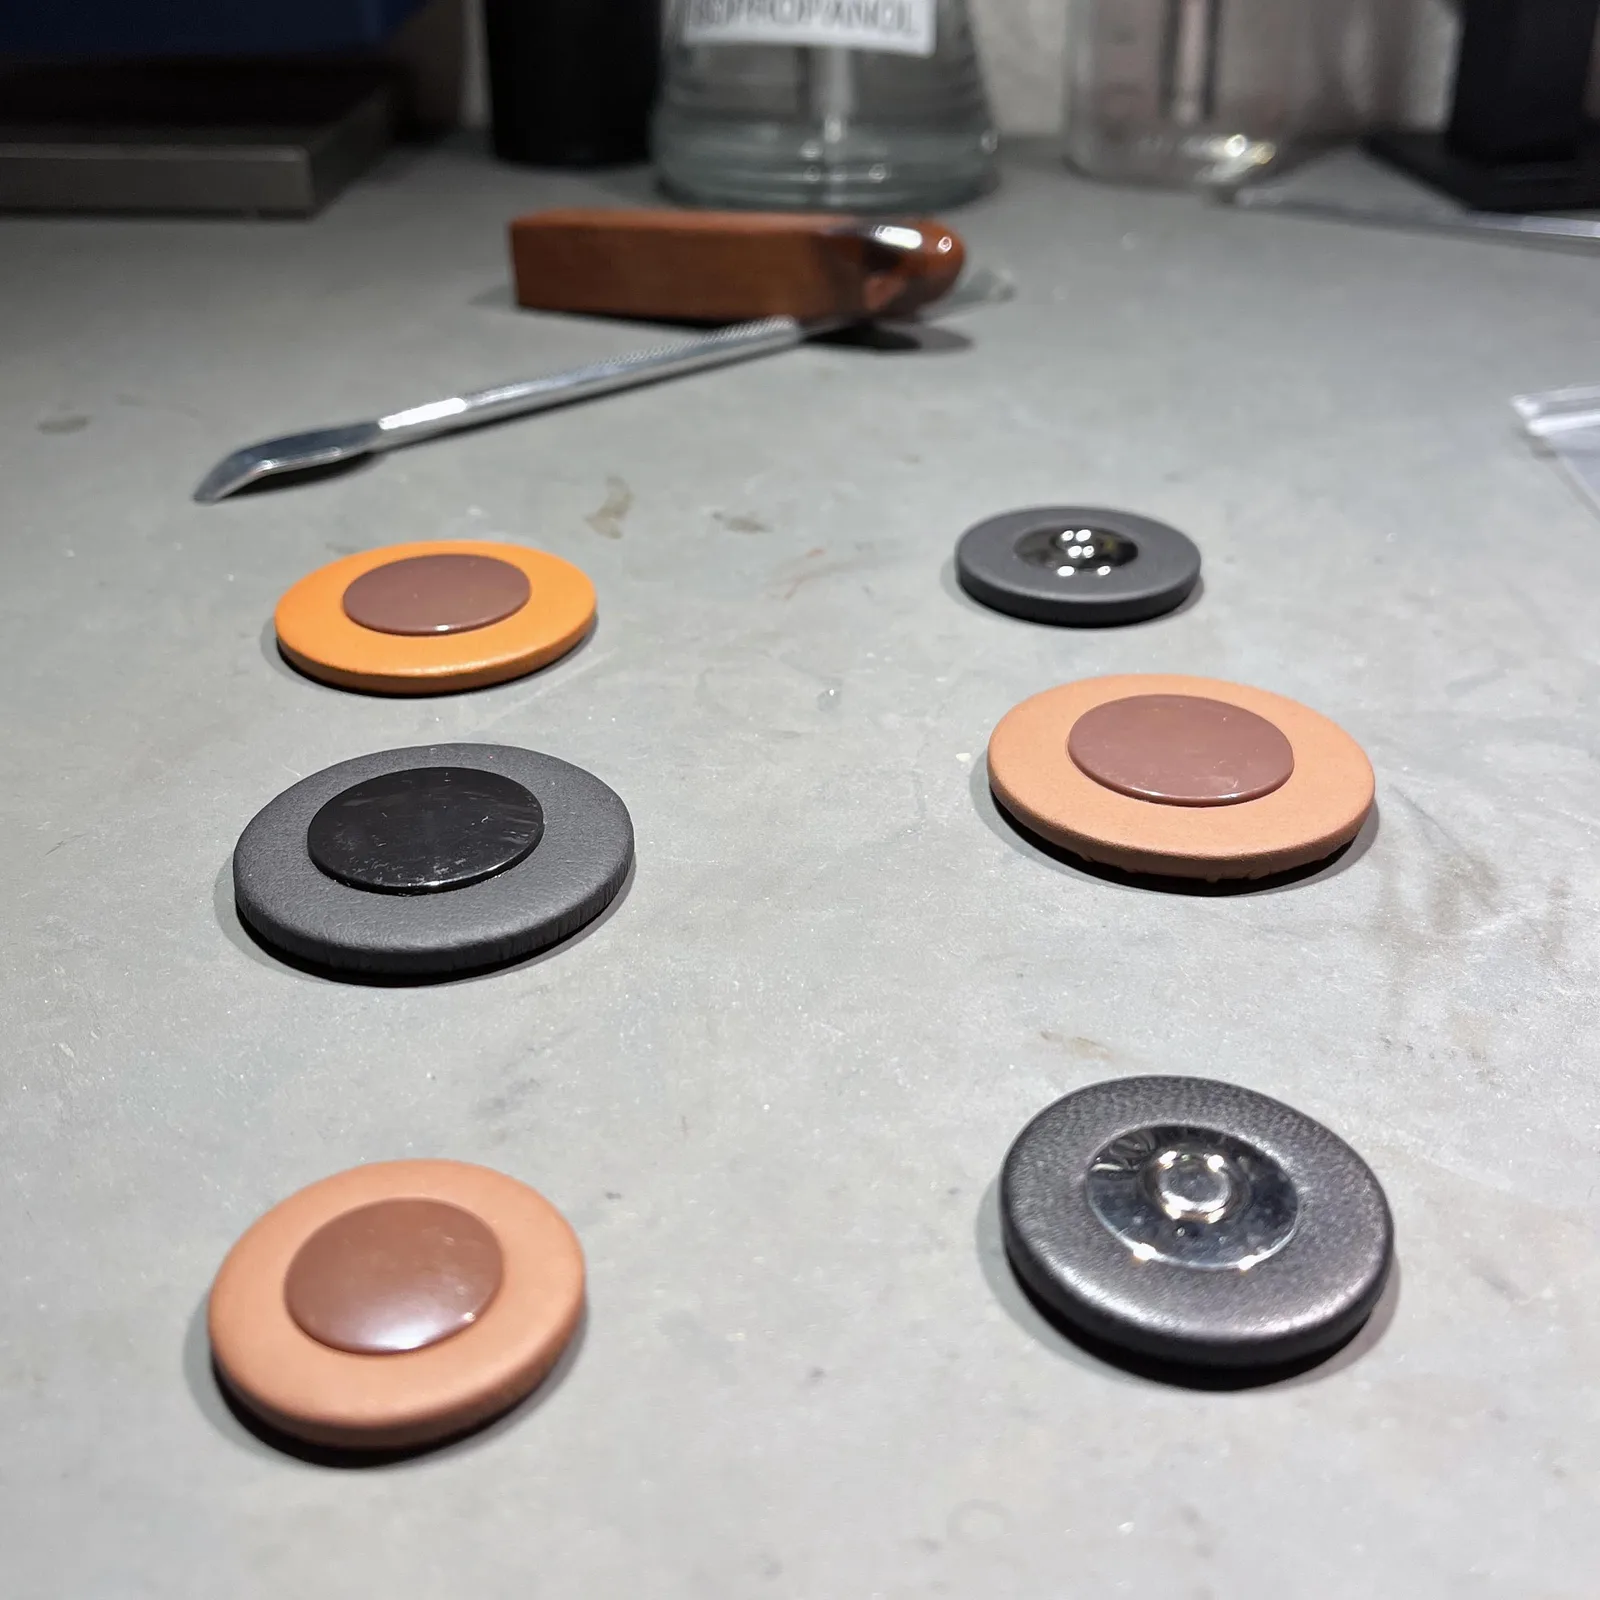
For some of the first saxophones I bought and restored, I used cheap no-name pads bought from China. I could get a whole set for around DKK 400.
Many of them were not completely flat, and the leather was not as tight as you could wish, but in the end I actually got them to seal properly. The problem was just that it took a really long time to fit them, and I have no idea whether they will last in the long run.
I have since tested pads from Pisoni, Rigotti, Claripad, Soundman, Yamaha and others, and in general the answer is pretty clear: It is much easier to fit a quality pad properly.
When I replace pads on a saxophone today, I generally use pads that I have good experience with myself and in a quality I can stand behind.
When I have worked with the same type of pad repeatedly, I develop a feel for how that particular pad reacts to heat, shellac and pressure.
This also means that I can fit the pads I have the most experience with more quickly, and the reduced working time ultimately means a lower price for the customer.
3. Resonators
Most saxophone pads have a resonator in the middle, typically made of plastic or metal. The resonator makes part of the pad’s surface stiffer and thereby affects the pad’s acoustic properties.
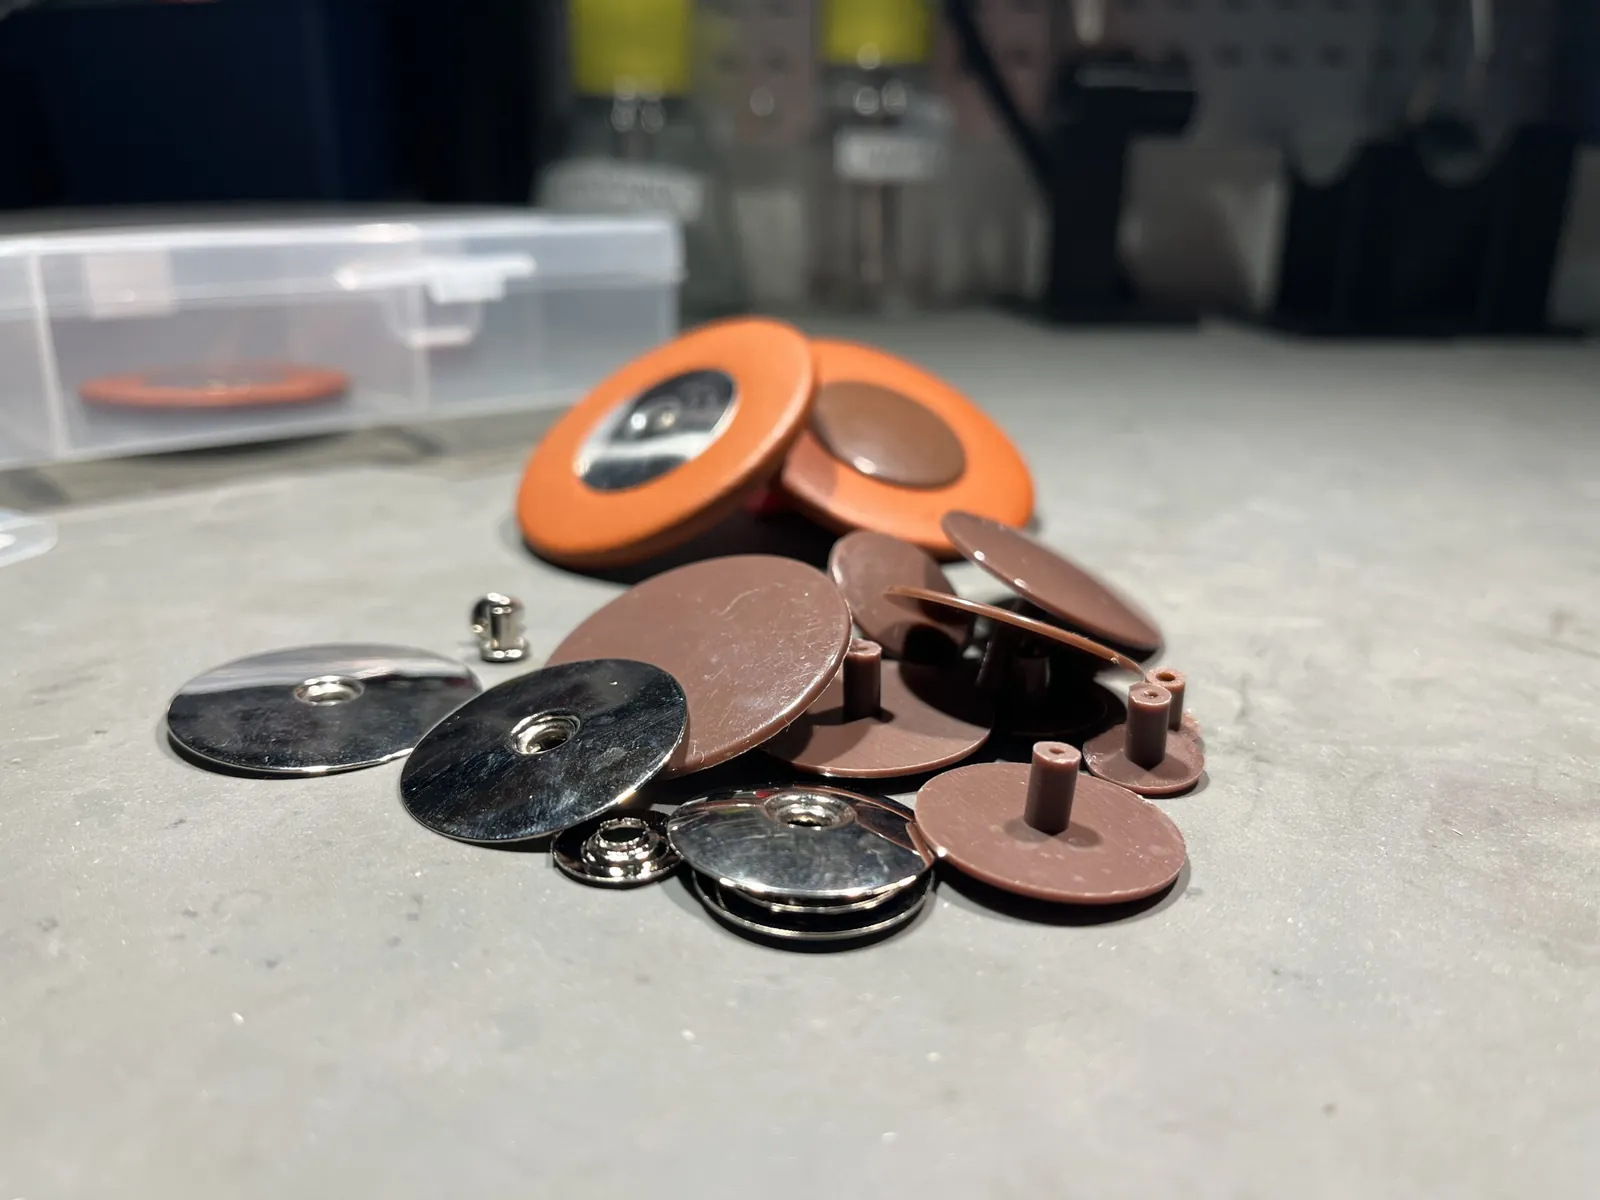
Resonators come in many sizes, shapes and materials, and the choice can affect both the price and the instrument’s response and tone. So it is not the case that an expensive resonator automatically makes a better saxophone. The choice is very much about preference, type of instrument and the tone and response you want.
Standard resonators in plastic or ordinary metal are relatively cheap and therefore rarely make up a large part of the price of a pad replacement. If you choose special versions and more exclusive materials, however, they can add several hundred kroner to the total cost of materials.
For a whole set of pads, standard resonators typically cost around DKK 150–250, while more exclusive resonators can cost DKK 500 or much more.
Price example for a complete set of pads
A set of pads for an alto saxophone (23–25 pcs.)
The price excludes fitting and typically applies to a sensible set of quality pads with standard resonators in plastic or metal.
How much work is involved in replacing saxophone pads?
Removing the old pad and putting in a new one is rarely the hardest or most time-consuming part of the replacement. That part lies in getting the new pad to seal completely afterwards, so that the saxophone plays properly. It takes patience, repeated small adjustments and tests, and a good deal of dexterity.
Felt and leather are compressible materials that are affected by moisture, age and use. Even pads of the same nominal size can therefore vary slightly in thickness and shape, and a few tenths of a millimetre can matter when the pad has to seal completely.
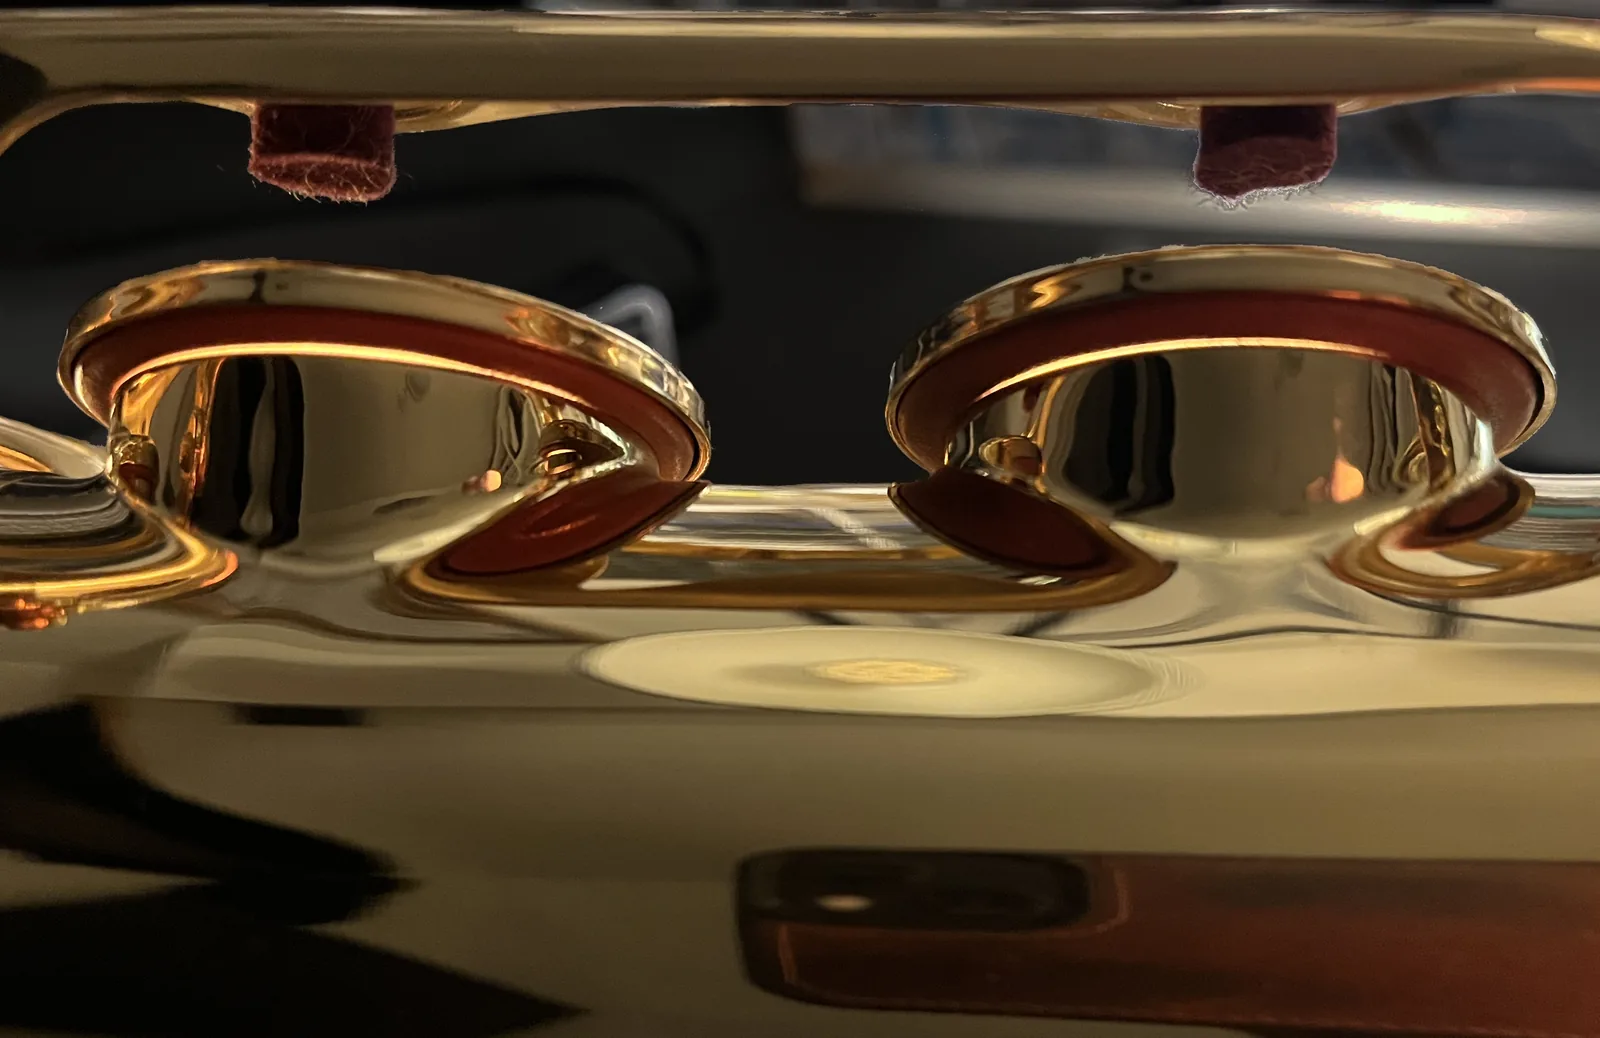
It often takes several rounds of heating the shellac, small adjustments and new tests before the pad seals completely (see the section How I replace saxophone pads).
It is precisely this process that takes time. It is not just about getting a new pad to stay in place, but about getting it to work precisely together with the rest of the saxophone’s mechanism.
How long it takes depends mainly on three things:
1. Which pad needs replacing?
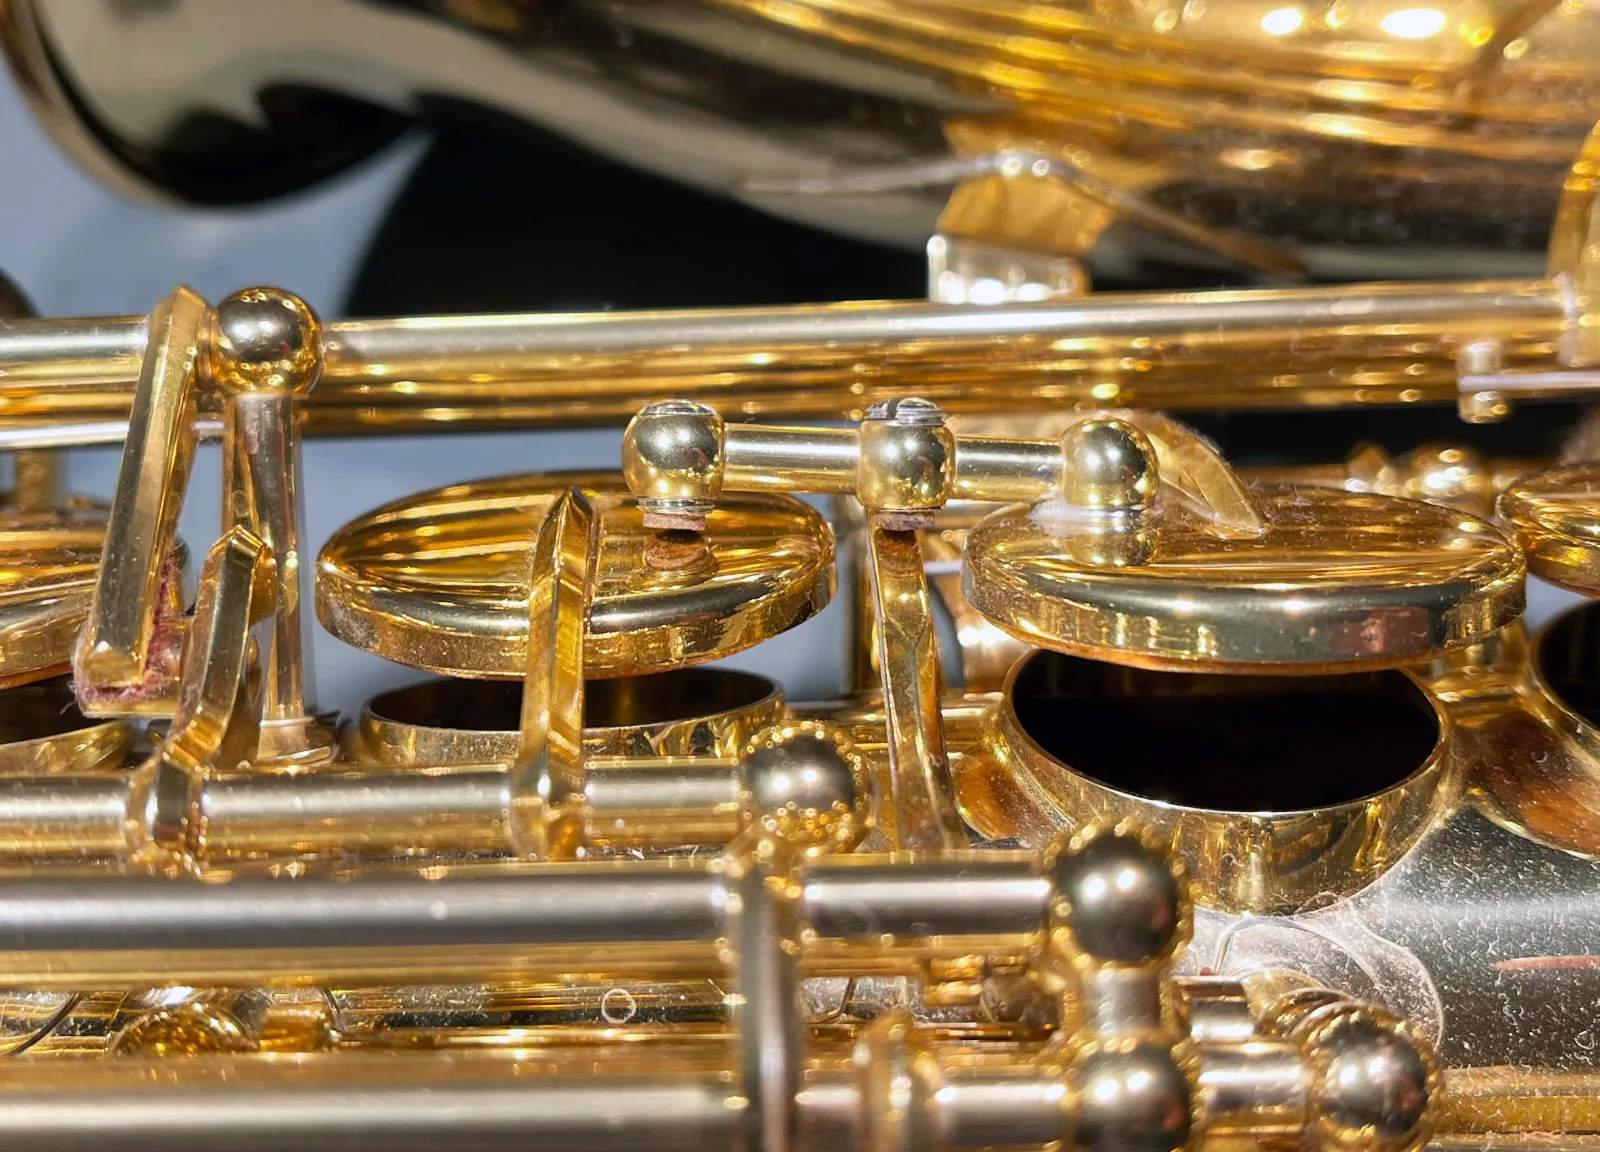
The top octave pad, which sits on the saxophone’s neck, is among the easier jobs. Here you can typically get to the pad simply by loosening a single screw in the mechanism, and the key is also small and relatively simple to work with.
Other pads are far more time-consuming, because other parts of the mechanism must first be removed before you can get to the pad in question. The G# pad is a good example of a pad where the replacement itself is only part of the work. On most saxophones the G# key is part of several mechanical linkages. Among other things, the left-hand C#, B and Bb keys are designed so that they can also affect the G# key. When the G# pad is replaced, these linkages must therefore be checked and, if necessary, fine-tuned afterwards.
2. Saxophone type and construction
Some saxophones are easier to repad than others. A baritone saxophone will usually take a little longer than a soprano, alto or tenor saxophone, partly because the instrument is larger and more awkward to handle. Some brands and models are designed to be easier to disassemble and may have adjustment mechanisms that make the subsequent regulation easier. This often applies to newer saxophones rather than older ones.
The Yamaha YAS-62 is a good example of modern engineering: The construction is logical and consistent, which makes the saxophone relatively easy to disassemble. It has several adjustment options in the mechanism, which make it easier to fine-tune the interaction between linked keys after fitting new pads.
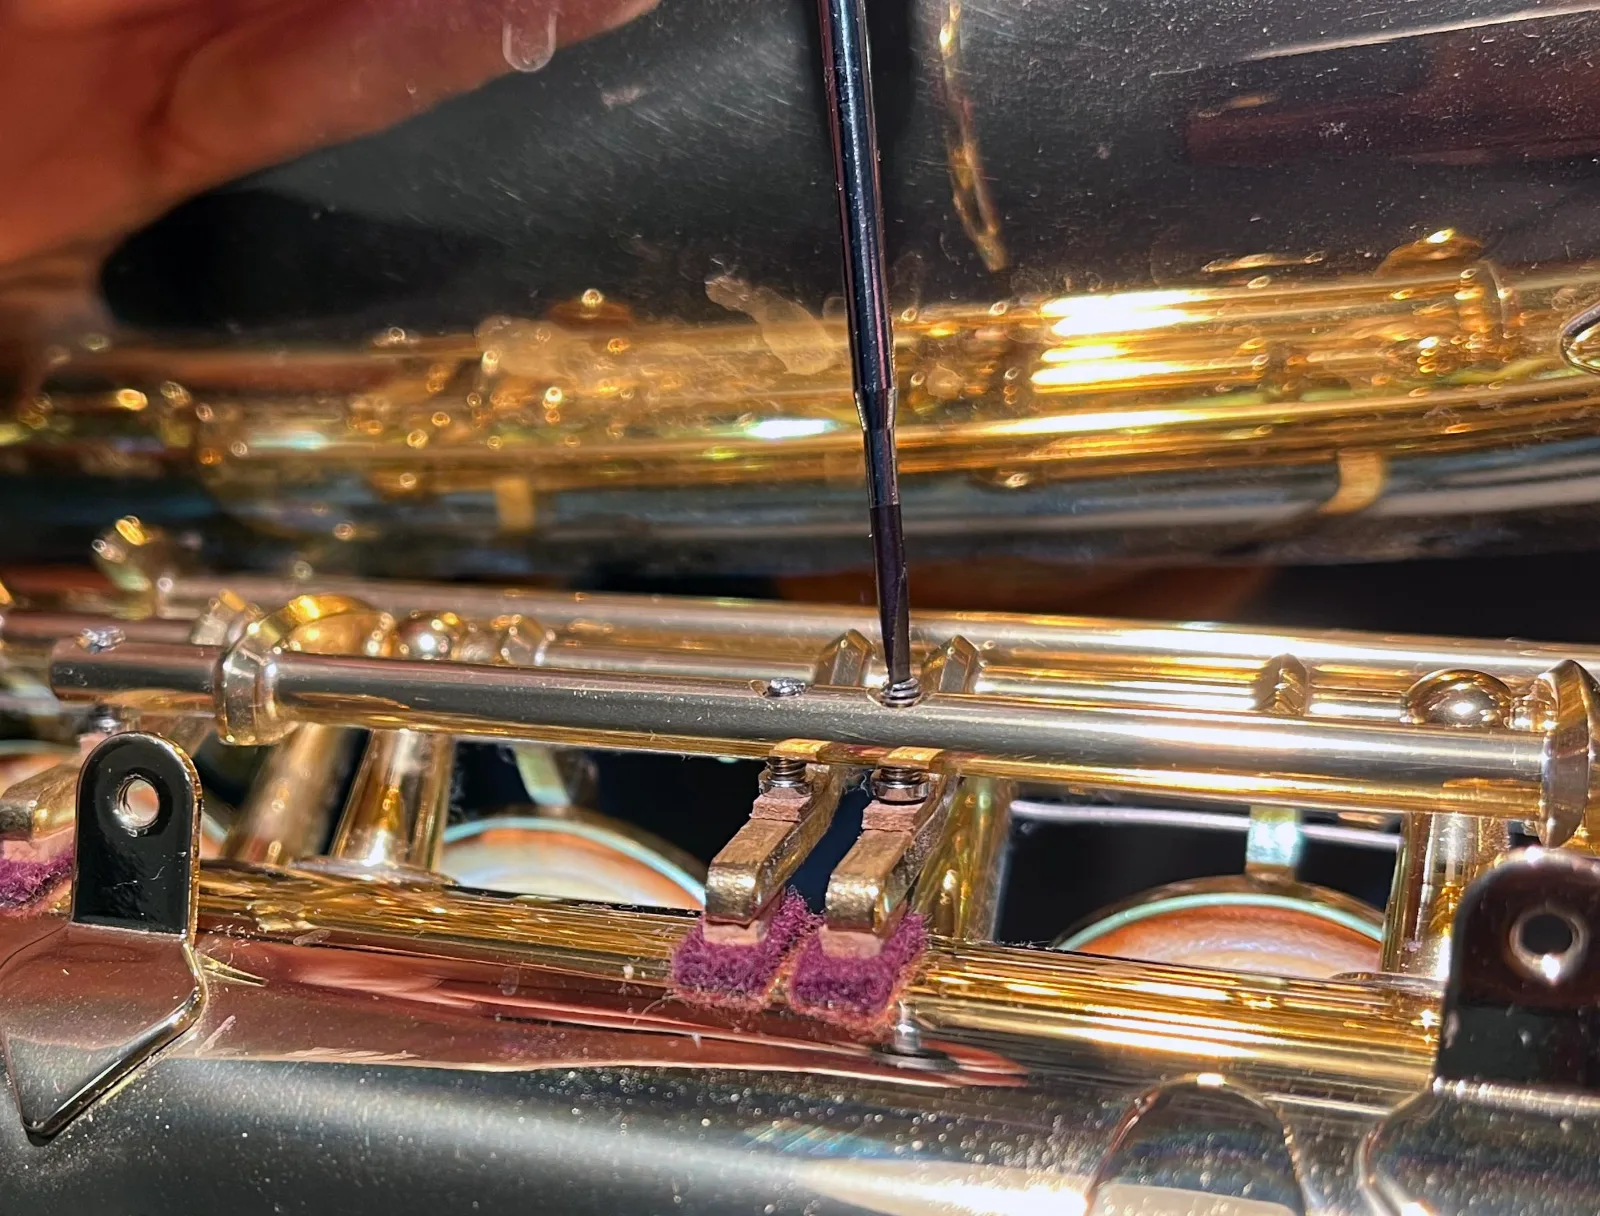
Conversely, a traditional construction does not mean the instrument is bad. A Buescher True Tone is an example of a respected saxophone with a more traditional construction – without many of the modern design solutions and with fewer built-in adjustment options. This means that regulation has to be done to a greater extent through precise mechanical fitting and adjustment of cork and felt.
3. The condition of the saxophone
Key point
The general condition of the saxophone is actually often what affects the price the most when pads need replacing. In the vast majority of cases the labour is the most expensive part, while the pads themselves make up only a small part of the total price.
On a newer, well-maintained saxophone the job can be relatively straightforward, because the mechanism already works properly and the keys sit as they should.
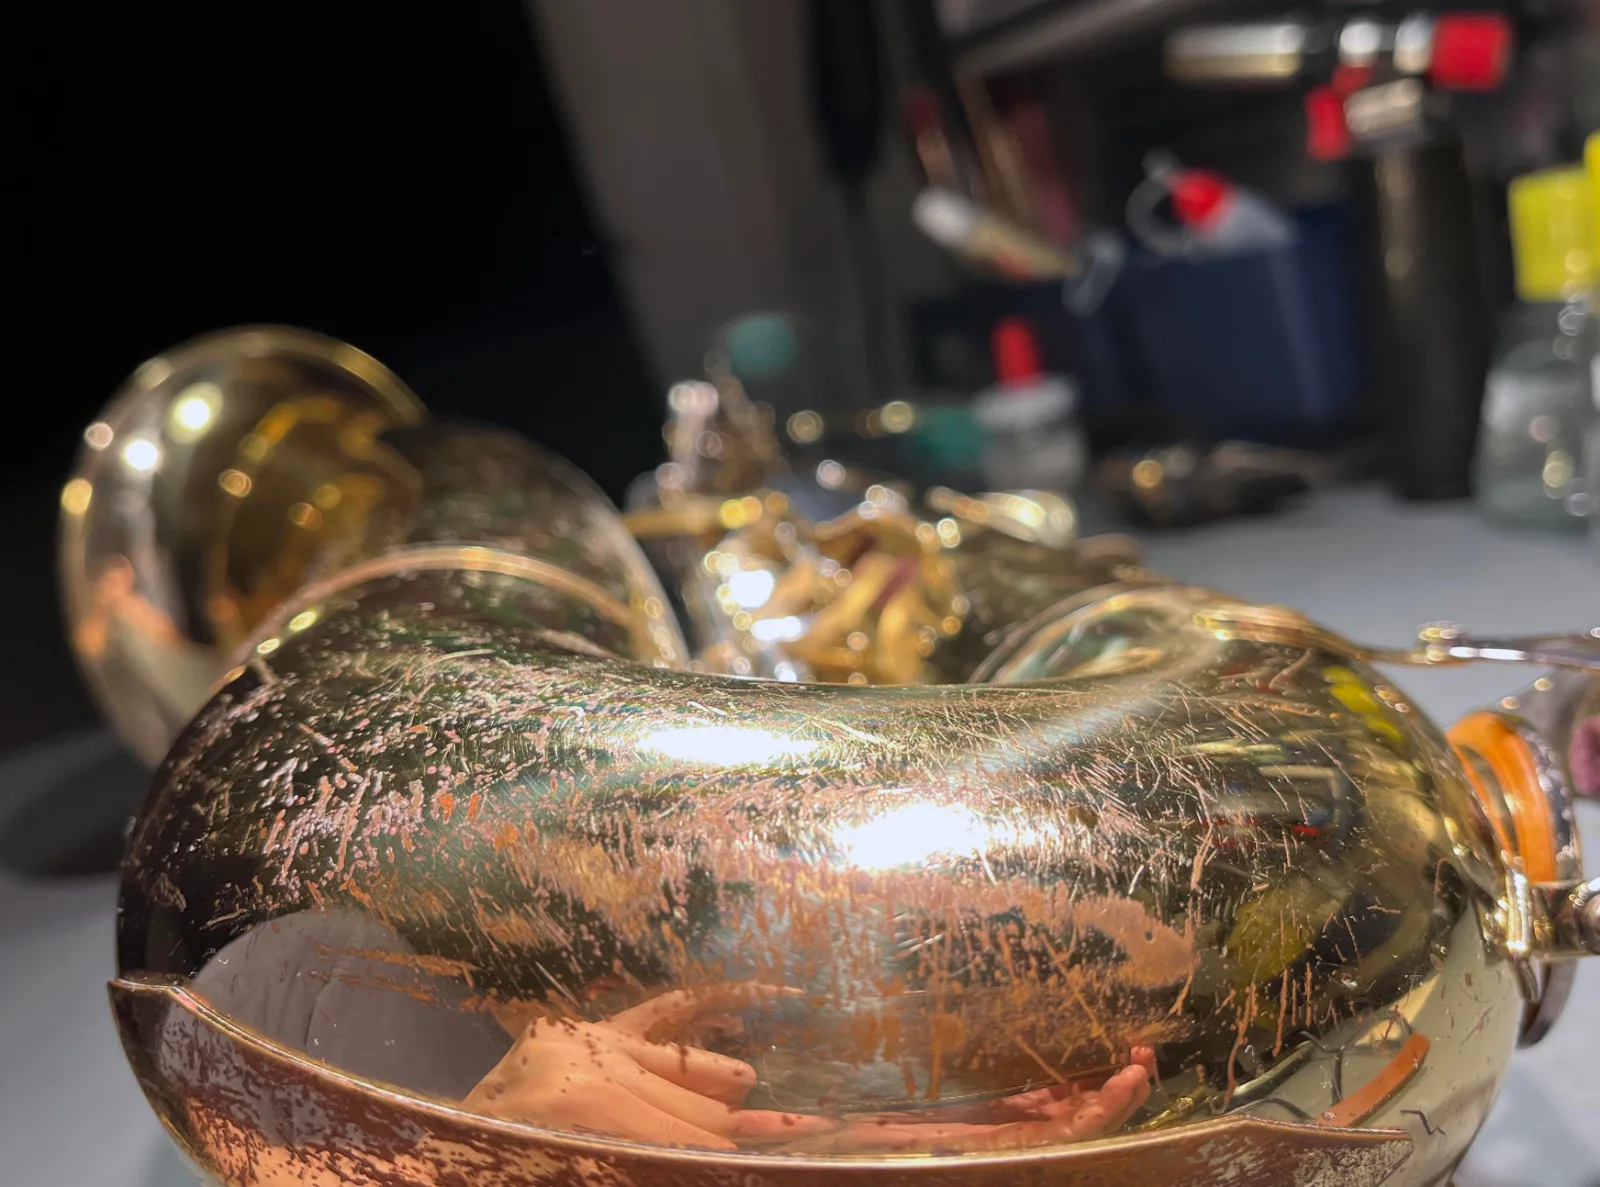
On an older or very worn saxophone the reality can be quite different. Here I may come across, for example, play in the mechanism, bent keys, worn pieces of cork and felt, tired springs or keys that are not correctly aligned with the tone holes. Such faults have to be corrected as part of the process. After all, there is not much point in fitting a new pad perfectly if the key itself is crooked or has so much play that it does not hit the tone hole the same way every time.
On very old instruments there may also be built-up dirt, old glue or lacquer that has to be removed or corrected before I can fit the new pads properly.
That is why two saxophones of the same model with exactly the same number of pads can require very different amounts of work.
Complete repad or just individual pads?
It is far from always necessary to replace all the pads on a saxophone just because one or more have started to leak. If the rest of the pads are still soft, stable and sealing well, I would normally only recommend replacing the pads that are actually worn or damaged.
On a worn saxophone where many of the pads are hard, deformed or starting to leak at the same time, it can make more sense to replace them all at once. This is often called a complete repad.
The advantage of a complete repad is not just that the saxophone gets new pads. At the same time the instrument is disassembled, inspected and regulated as a whole, so that all keys and linkages can be made to work properly together.
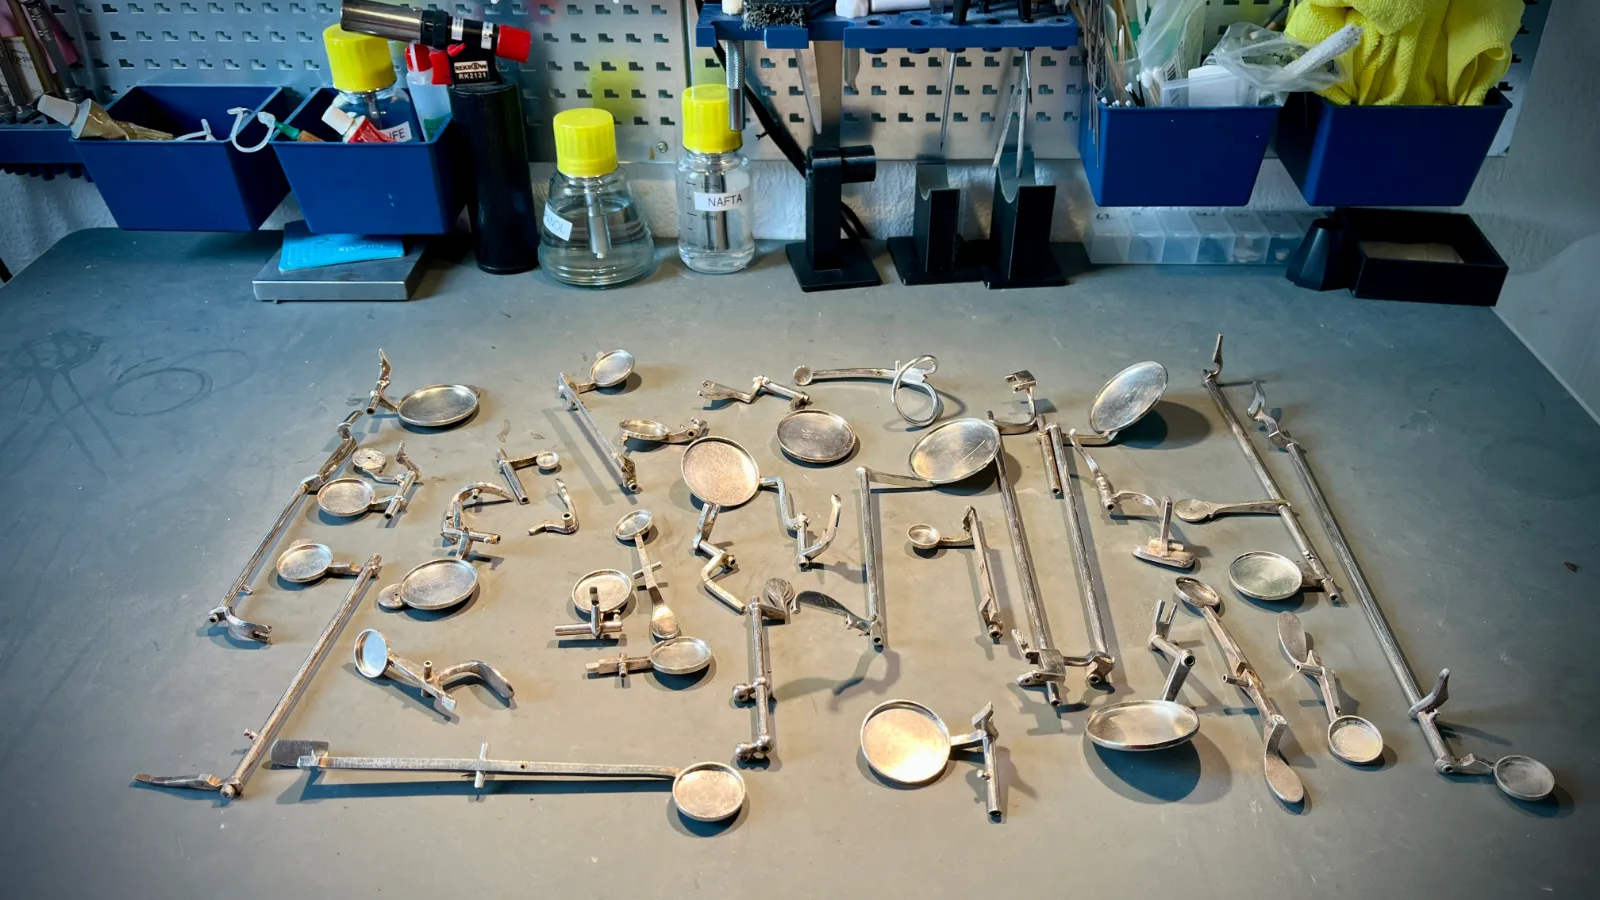
When I assess whether a complete repad makes sense, I therefore look not only at the condition of the pads, but also at the saxophone’s mechanism and how much other work needs to be done on the instrument. In some cases it makes far more sense to replace individual pads and regulate the instrument.
Examples of time required
I have looked into what other saxophone repairers in Denmark and abroad state in terms of prices*, but it is more the exception than the rule that anyone actually gives specific price examples for their jobs.
As the earlier sections have hopefully shed light on several times, this is of course often because it is very difficult to give price estimates without having looked at the actual saxophone.
Several do, however, state guideline prices, and my own examples of pad replacements below match them quite well in the vast majority of cases. In the examples below I work in time rather than price, as hourly rates vary quite a bit from repairer to repairer. My hourly rate is DKK 600, so you can work out a rough estimate yourself. You will find my own prices in the summary. See saxophone repair prices.
When I use the terms “traditional” and “modern” below, I mean the construction (see the section 2. Saxophone type and construction). The G# pad is used as an example because it is part of several mechanical linkages (see the section 1. Which pad needs replacing?).
The times are guidelines and cover labour only – pads come on top. The examples apply to an alto saxophone. Soprano and tenor take roughly the same, while baritone typically takes longer.
Approx. ½–1 hour
On an alto saxophone without major faults:
- Top octave pad on the neck
- Pad on one of the palm keys (D, Eb or F)
- Pad on one of the side keys (e.g. high E or C)
Approx. 1–2 hours
On an alto saxophone without major faults:
- G# pad on a modern alto saxophone
- Pad on one of the low little-finger keys (C#, B, Bb, C or Eb)
- Pad on one of the main keys in the left hand (B, A or G)
Approx. 2–3 hours
- G# pad on a modern alto saxophone with some wear
- Pad on one of the main keys in the right hand (F, E or D), where the linkage to F# and Bb has to be readjusted
Approx. 4–8 hours
- G# pad on a traditional alto saxophone with some wear, where several keys and other mechanism also need adjusting
- Replacement of the five low pads (C#, B, Bb, C and Eb) incl. regulation of the linkages
- Replacement of 5–8 selected pads on a modern alto saxophone without major faults
Approx. 8–15 hours
- Complete replacement of pads on a modern alto saxophone without major faults and without cleaning the instrument
NB! With a complete repad the time per pad is lower, because the whole instrument is disassembled and regulated in one go.
Approx. 15–25 hours
- Complete replacement of pads on a traditional alto saxophone with some wear, where further mechanical fitting and regulation must be expected
How long does a saxophone pad last?
There is no fixed lifespan for a saxophone pad. On an instrument that is played regularly, many pads can last 5–10 years or longer, while individual pads can wear out much sooner. On a saxophone that is used very little and stored well, you can also easily find considerably older pads that still work fine.
The lifespan depends, among other things, on how much the saxophone is played, how moist it gets during use, how it is dried and stored, and the quality of the pad itself.
Nor do the pads necessarily wear at the same rate. Some keys are used far more than others, and some pads are more exposed to moisture or mechanical stress than others. It is therefore completely normal for one or more pads to need replacing while the rest still have many years of life left.
Typically it is the G# pad, the low C# pad and the low Eb pad that are affected by moisture the fastest and therefore often show signs of wear or deterioration first. This is mainly because they are normally closed when not pressed, and therefore collect condensation more easily.
The pads on the palm keys are likewise closed at rest and can therefore also become damp, sticky or mouldy.
Condition – not age
What matters most is not the pad’s age, but its condition. An old pad does not need replacing if it is still soft, stable and seals well. Conversely, a relatively new pad may be ready for replacement if it has become hard, damaged or deformed.
Clear signs of wear
There are several signs that may indicate that a pad is wearing out:
- The leather has become hard, dry or brittle
- There are cracks or damage in the surface
- The tone hole has left a very deep and permanent impression in the pad
- The pad has become uneven or deformed
- The leather around the edge is starting to come loose
- The resonator is loose
- The pad sticks repeatedly, even after cleaning
- The pad can no longer be made to seal with normal adjustment
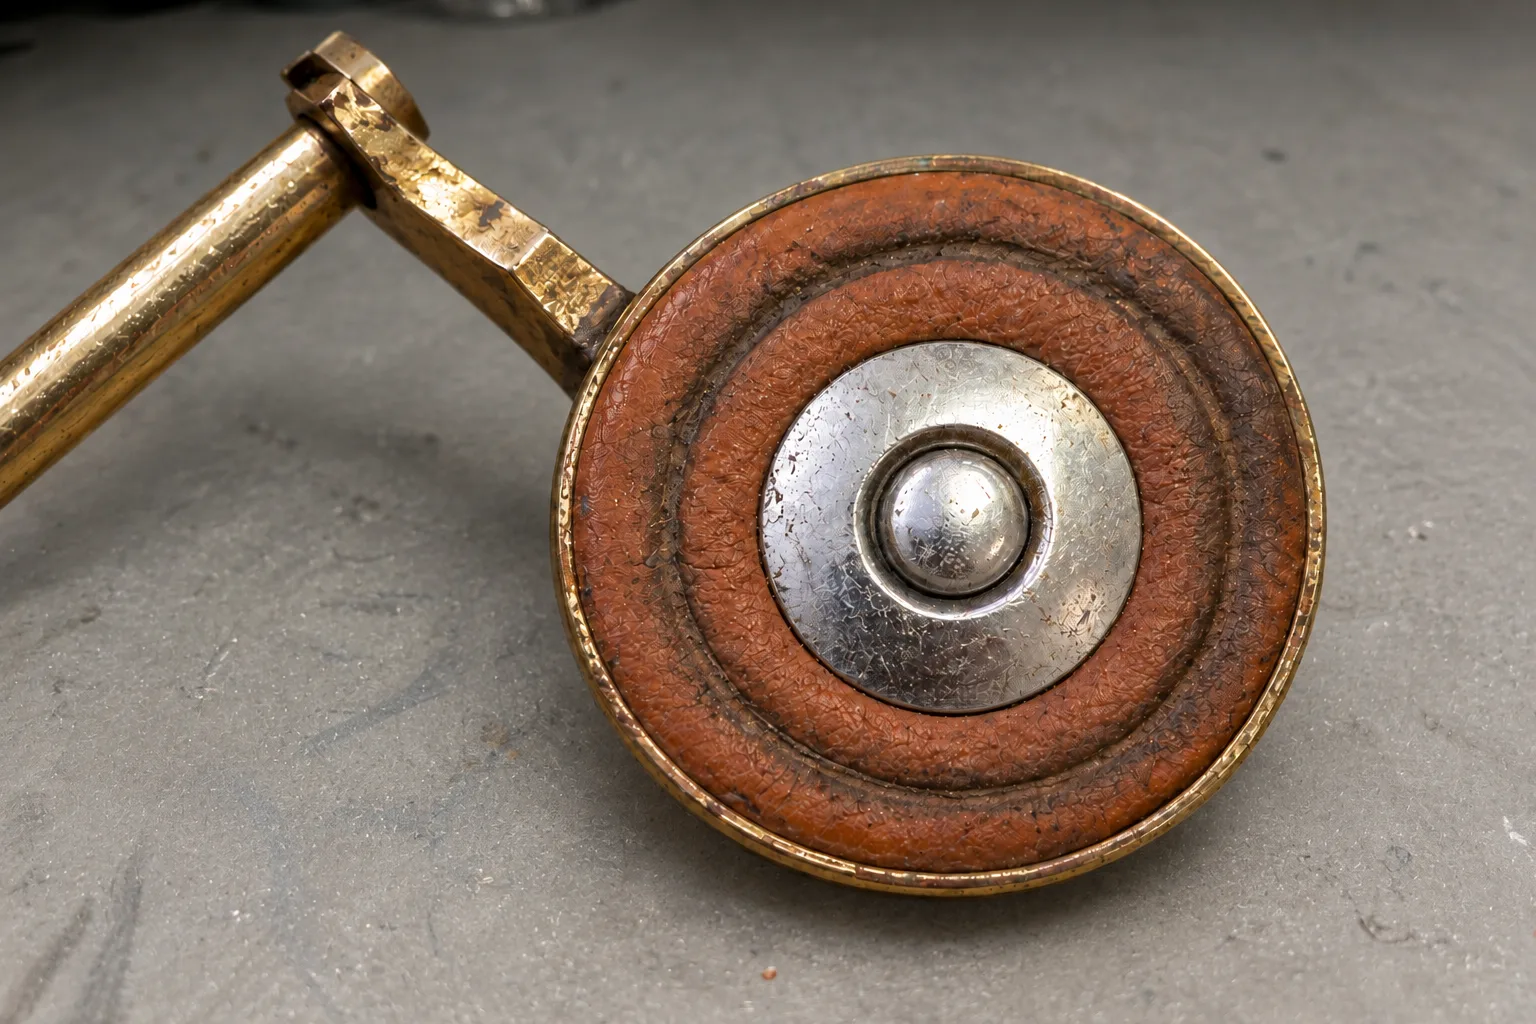
A dark impression from the tone hole or discolouration, on the other hand, is not necessarily a problem in itself. A pad can look old and still work fine.
If the saxophone suddenly becomes harder to play, especially in the low register, needs more air than usual or responds worse on certain notes, it is a good idea to have it checked for leaks. That does not necessarily mean all the pads need replacing – often the problem can be solved with adjustment or replacement of individual pads.
Maintenance: Make your pads last longer
You cannot prevent saxophone pads from wearing out, but good maintenance can extend their lifespan considerably.
The most important thing is to get as much moisture as possible out of the instrument after use. When you play, condensation forms inside the saxophone, and some of this moisture ends up around the tone holes and pads. If the instrument is put straight into the case without being dried, the pads are exposed to an unnecessary amount of moisture.
So use a pull-through swab every time you have played, so the moisture is drawn out of the instrument, and dry the most exposed areas as far as possible. A wet pad can be dried carefully with suitable cleaning paper between the pad and the tone hole. Close the key lightly against the paper, open it again, and only then remove the paper – avoid pulling the paper out while the pad is pressed against the tone hole.
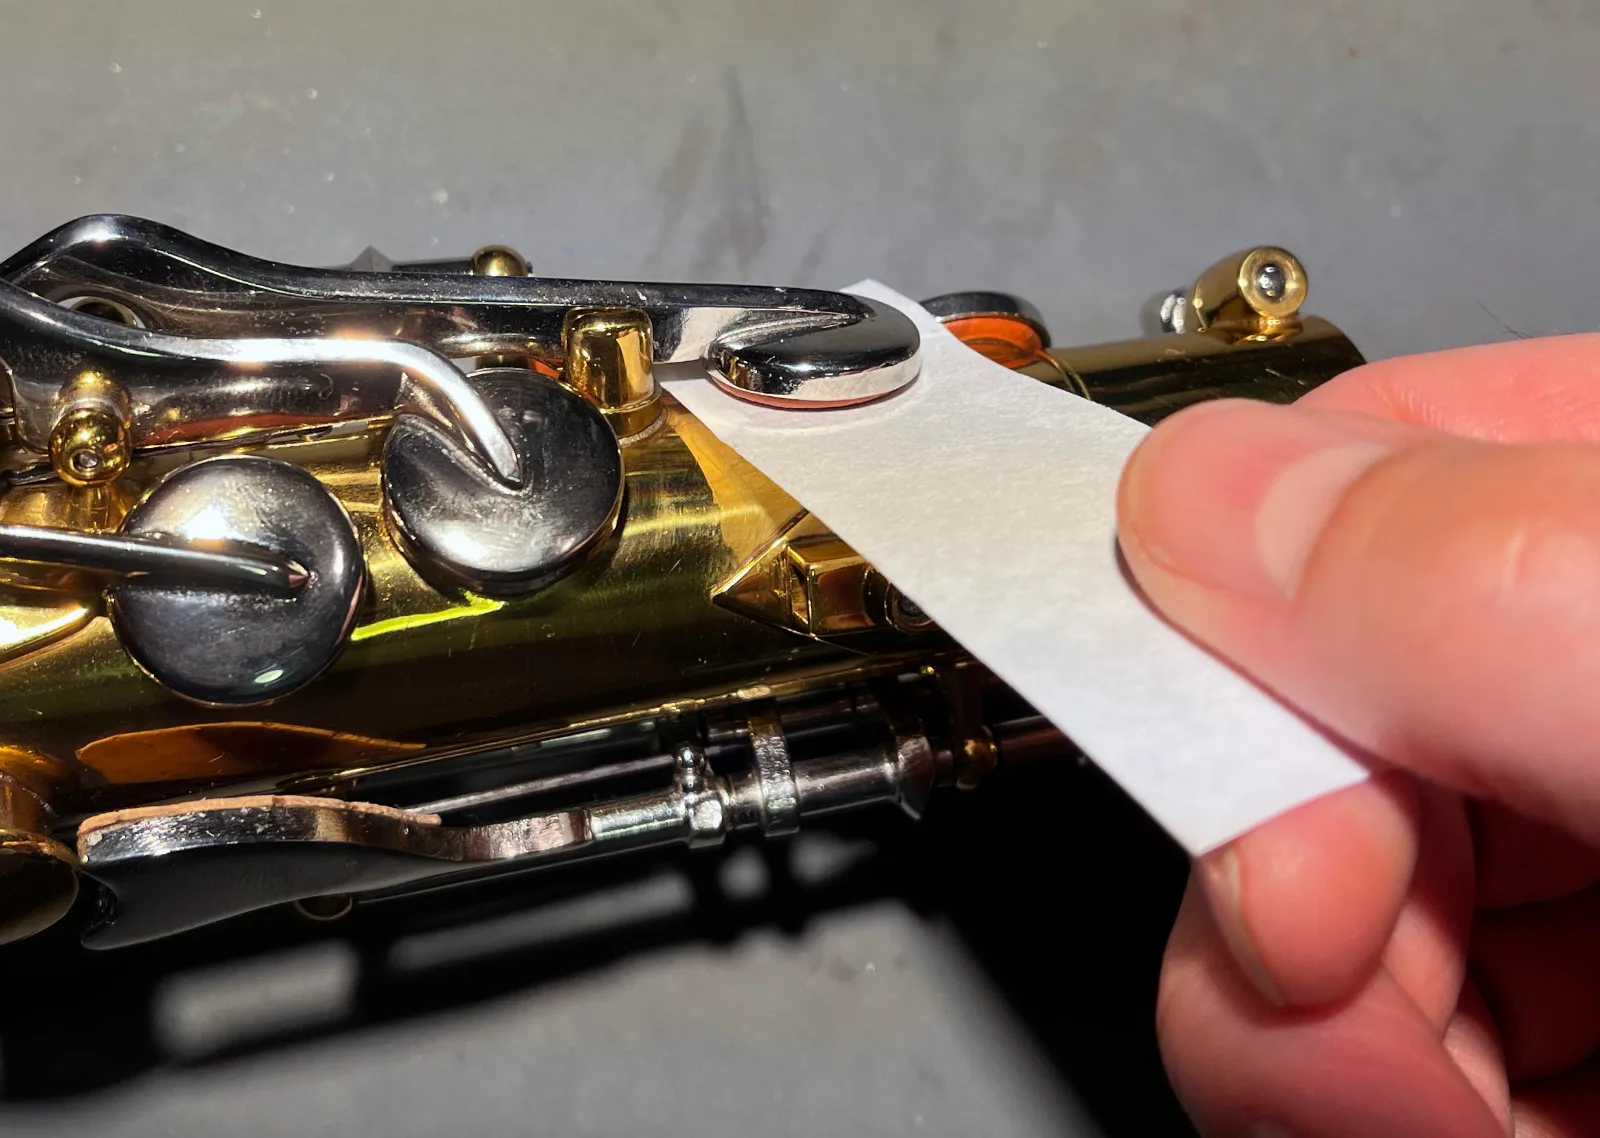
It is also a good idea to:
- Let the saxophone dry a little before it is shut away completely in the case
- Avoid storing the instrument somewhere very warm or damp
- Keep tone holes and pads free of dirt
- Have sticky or leaking pads checked if the problem persists
You should not try to “treat” the leather with random care products. A saxophone pad is designed to have a certain firmness and surface, and oil or other products can change the properties of the material and, at worst, make the problem worse.
Sugar and the “smacking sound”
If you drink soft drinks, juice or other sugary drinks shortly before playing, small amounts of sugary saliva can get into the instrument. When the moisture dries, it can leave a sticky coating on the pad and tone hole.
This can make the key stick slightly, producing the characteristic “smacking sound” when it opens and closes. Over time the deposits can also collect more dirt and make the problem worse.
It is therefore a good idea to drink water and preferably rinse your mouth if you have had something sweet just before playing.
Let the closed keys dry
If there is still moisture between the pad and the tone hole on the closed keys, these areas dry more slowly than the keys that stand open on their own. Dab carefully with a small cloth or paper.
Tip: Key props
There are small wedges, “key props”, which are placed in the mechanism and hold the normally closed keys slightly open while the saxophone dries. They are typically used on the Eb key and the low C# key. On many saxophones the C# and G# mechanisms are linked, so a wedge at the C# key can also indirectly open the G# key. This gives some of the most exposed pads better airflow so they can dry, which can reduce the risk of sticky pads and moisture-related deterioration.
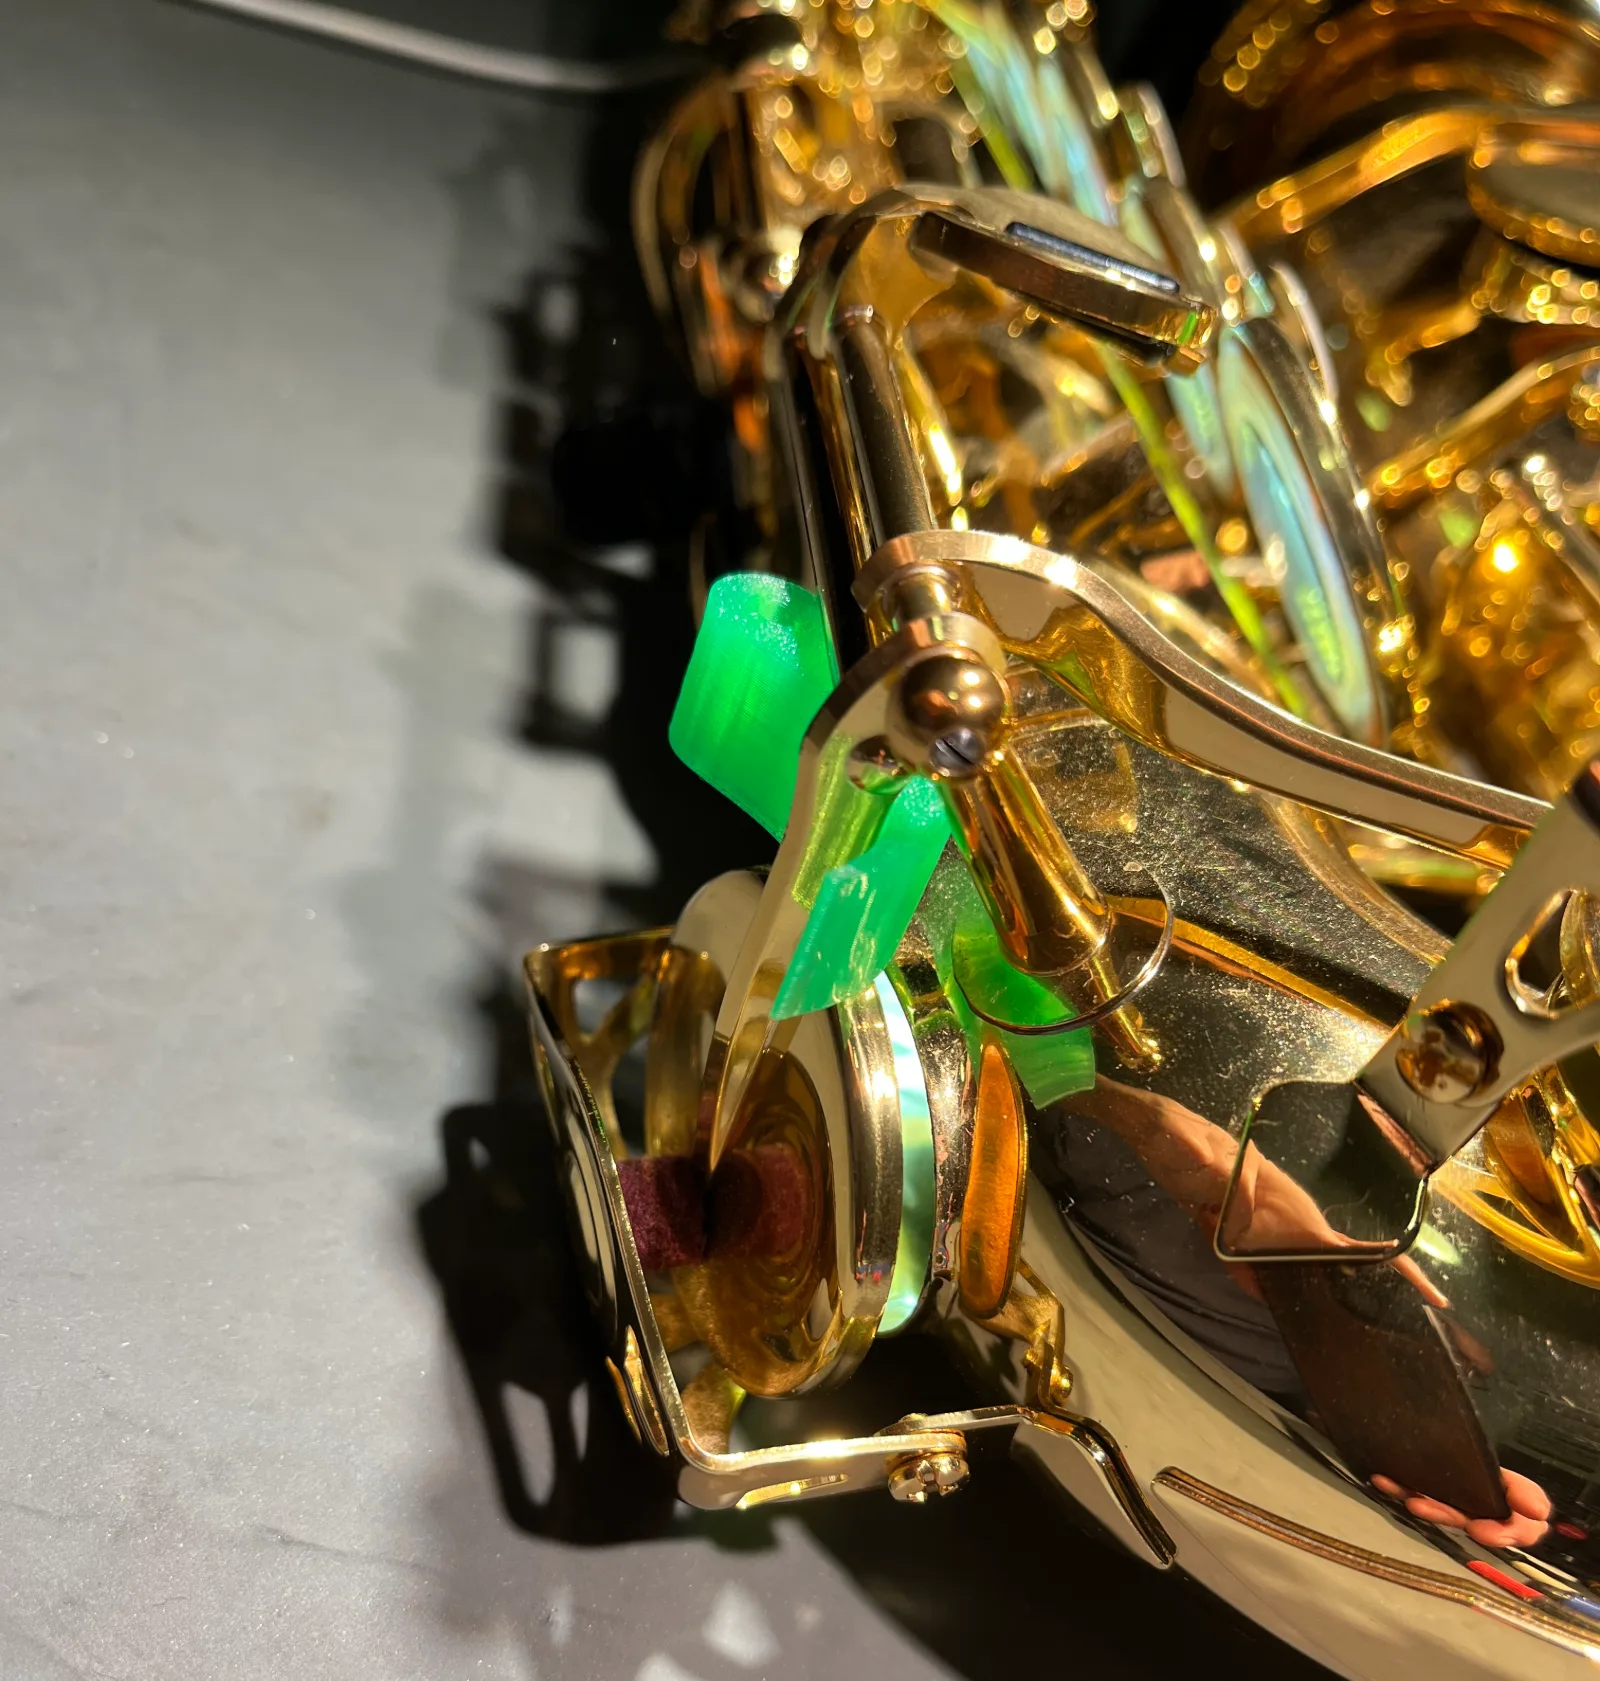
A small effort every time you play is therefore far better than trying to rescue the pads once they have become hard, deformed or damaged.
Can you replace saxophone pads yourself?
Yes, you can – especially if it is a single, easily accessible pad. The process of removing the old pad, cleaning the pad cup and fitting a new pad with shellac or another suitable glue is not necessarily very complicated.
The hard part comes afterwards.
The new pad has to be seated, so that it meets the tone hole evenly all the way round and seals completely with very light pressure on the key. Even a tiny leak can affect the saxophone’s response. Professional repairers therefore work with, among other things, leak lights and very small adjustments of the pad’s position while the shellac is warm and can be moved.
It takes both the right tools and a fair amount of practice to judge where a pad is leaking, and whether the problem is due to the position of the pad itself, its thickness, a crooked pad cup or the saxophone’s mechanism. Even very small differences can be decisive.
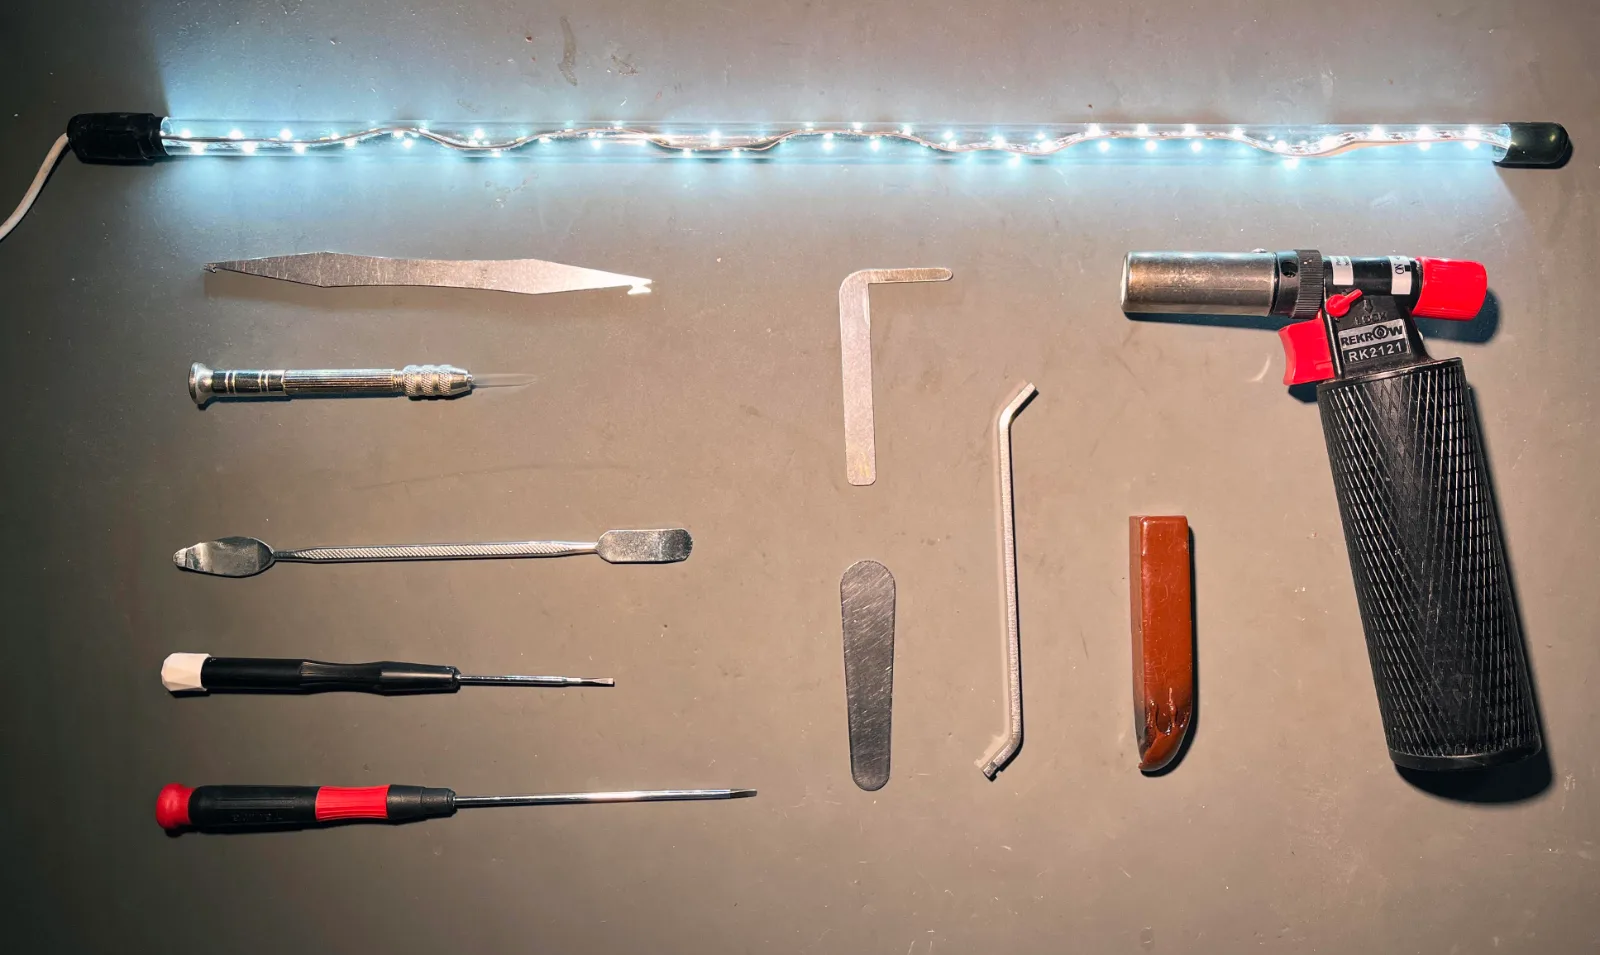
A single octave pad is therefore a far more realistic DIY project than, for example, a pad that is part of a mechanical linkage with several other keys. A complete repad is a completely different task, because all the pads must afterwards work properly together with the rest of the saxophone’s mechanism.
If you would like to learn saxophone repair, replacing individual pads on a cheap practice instrument can be a good way to start. But if the saxophone has some value, or it needs to play optimally afterwards, I would recommend having the work done by a repairer with experience in seating and regulating pads.
How I replace saxophone pads
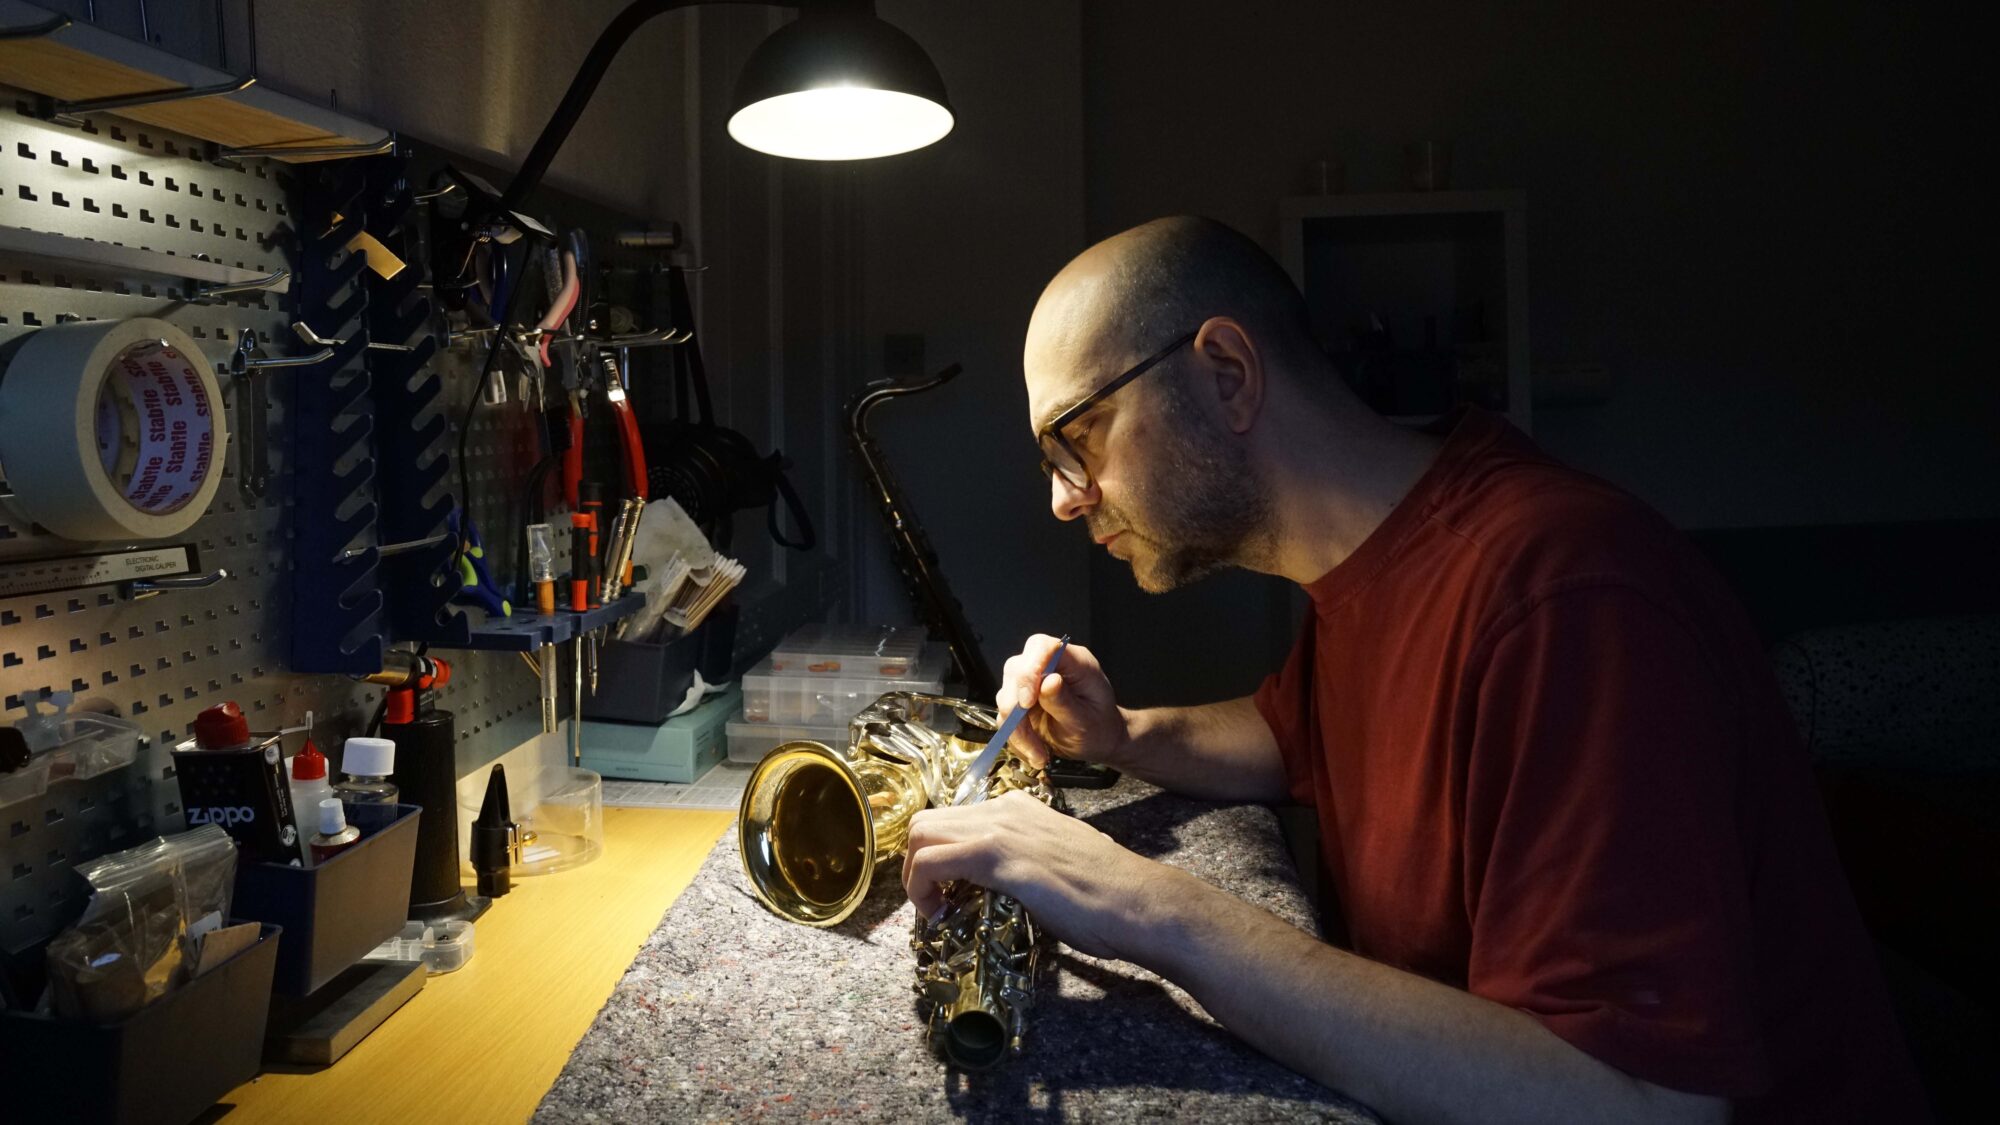
When I replace a pad, it is not just about finding the right size and gluing it in. Before the pad is fitted permanently at all, I need to make sure that the key, pad cup and tone hole are correctly aligned with each other.
-
Disassembly and inspection
First I remove the key and take out the old pad. Remains of old shellac or glue are cleaned out of the pad cup, which I also check for distortion. I also check the key’s position over the tone hole and any play in the mechanism, because a new pad cannot compensate for a key that is fundamentally out of position.
-
Choosing and dry fitting the pad
Next I choose a pad with the correct diameter and thickness. The pad must fit precisely in the pad cup without being squeezed or deformed.
I can then do a dry fitting, where the pad is placed in the pad cup without glue and the key is mounted on the saxophone. That way I can check how the pad naturally meets the tone hole before it is glued in place.
The goal is to get the geometry as correct as possible beforehand. The shellac should not be used to compensate for a major fault in a bent key or pad cup.
-
Fitting with shellac
When everything fits, I put shellac behind the pad. The pad cup is heated carefully so that the shellac becomes soft or liquid, and the pad is placed on top of it.
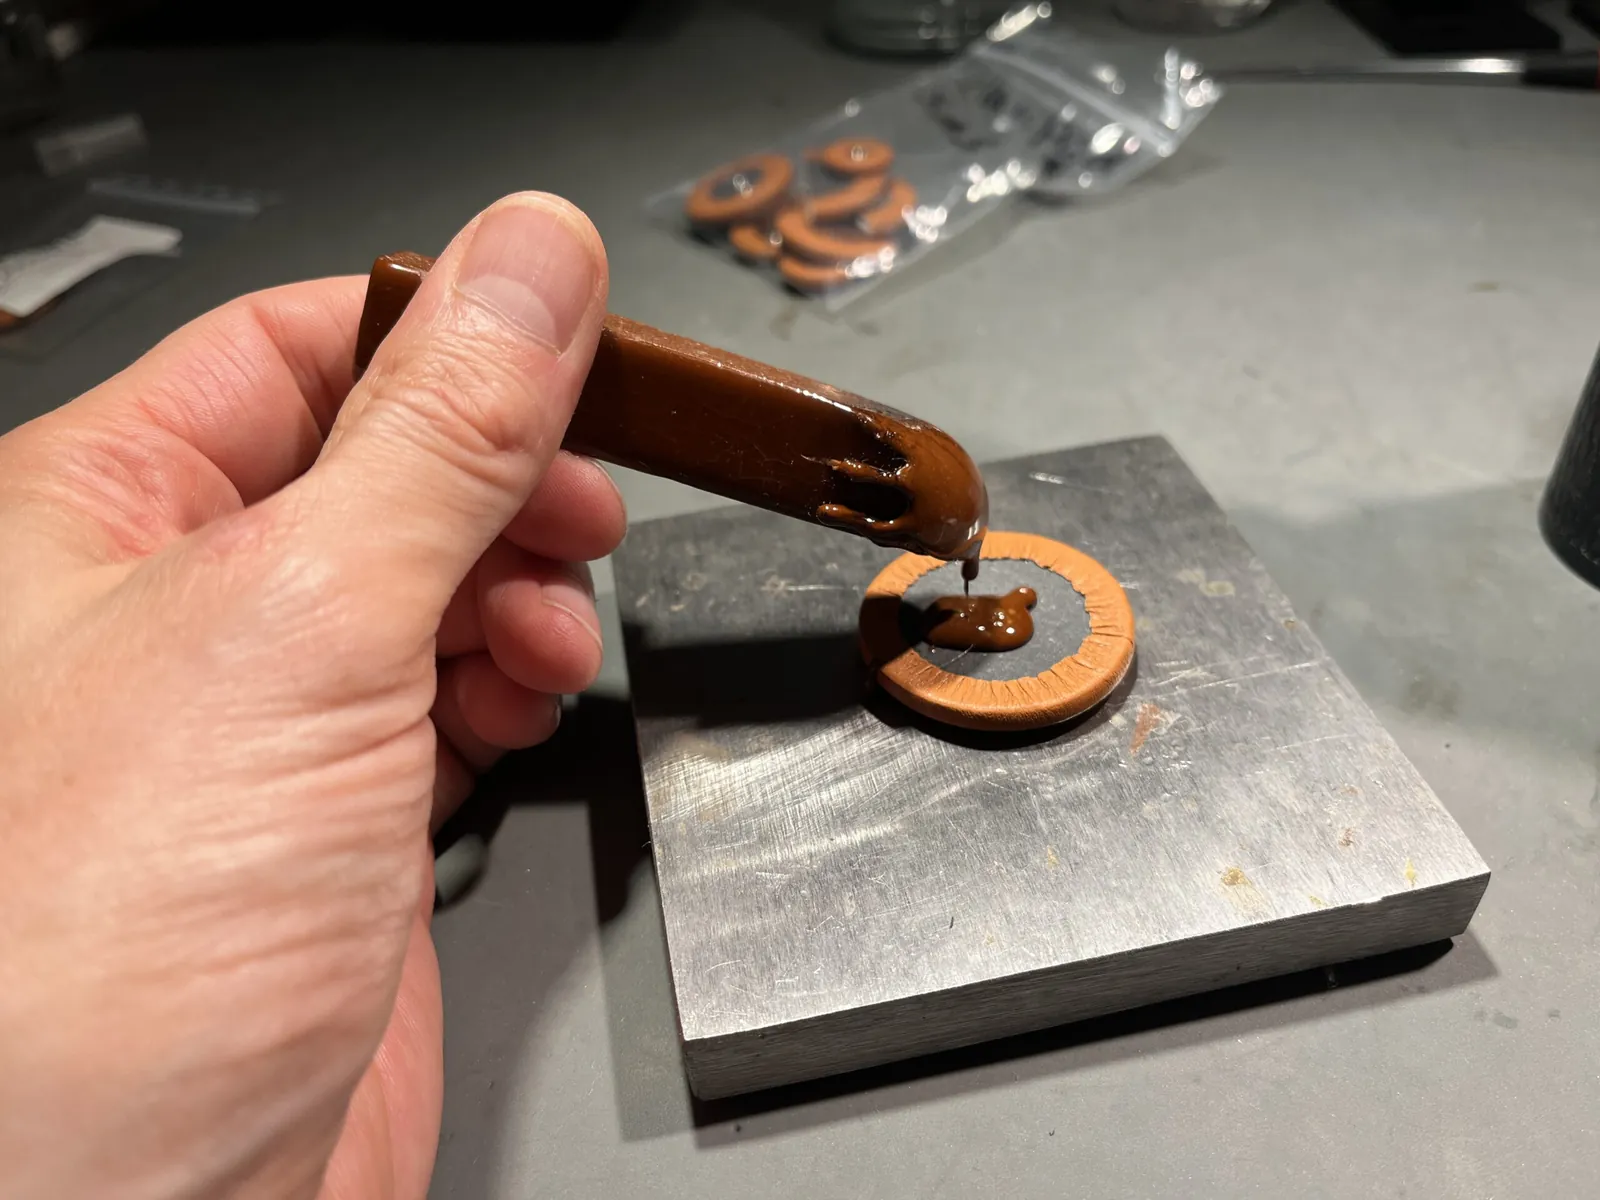
Hot shellac is applied to the back of the pad before it is fitted in the pad cup. With the method often called floating, the pad “floats” on a thin layer of shellac. When I heat the pad cup again, I can move the pad very slightly, independently of the key itself. This makes it possible to fine-tune the pad’s angle and position very precisely.
-
Seating and checking for leaks
Now the pad has to be seated against the tone hole. The goal is for the whole rim of the tone hole to meet the pad at the same time, and for the key to seal completely with very light pressure.
Among other things, I check the seal with a leak light, which is placed inside the saxophone. If light escapes between the tone hole and the pad, there is a leak.
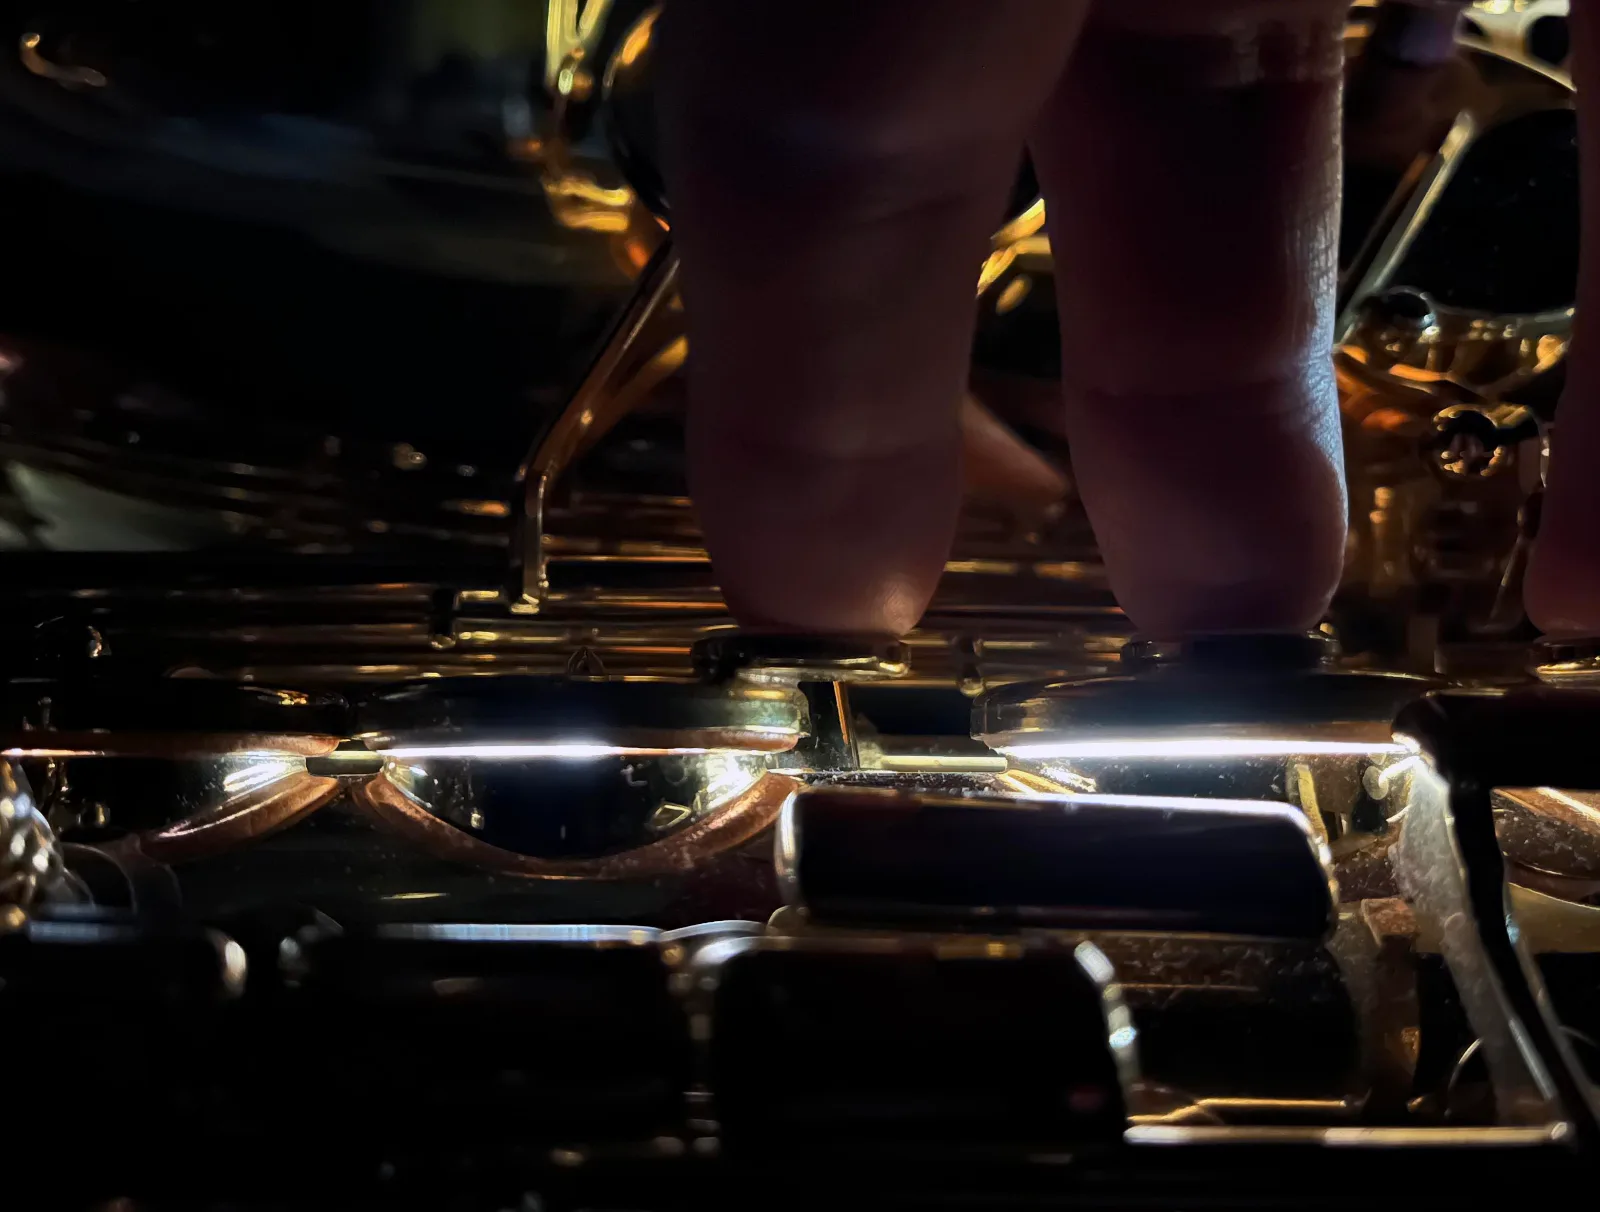
With the leak light inside the saxophone and the room lights off, you can see where light seeps out between pad and tone hole. I can also use very thin feeler material between the pad and the tone hole. By carefully pulling the material out at different points around the pad, I can feel whether the resistance is the same all the way round.
If, for example, the pad hits the tone hole first on one side, I heat the pad cup again so the shellac softens. Then I move the pad very slightly, let it cool and test again. I continue like this until the pad seals completely – and that can easily take many repetitions for a single pad.
-
Finally, the mechanism has to work together
Once the pad itself seals correctly, the job is not necessarily finished. Many of the saxophone’s keys are mechanically linked, so that one key has to close another at exactly the right moment.
Here even small changes in the height of the pad can affect the regulation. That is why I also check and adjust cork, felt and other regulation points, so that the keys close simultaneously and with the right pressure.
Finally, I check the instrument again with the leak light and finish with a play test.
It is this combination of mechanical fitting, dry fitting, floating, seating and subsequent regulation that makes replacing saxophone pads precision work – and not just a matter of gluing a new pad into the key.
Summary
Pads
A single pad costs from approx. DKK 15 for the smallest to approx. DKK 100 for the largest baritone pads.
A complete set of pads for an alto saxophone typically costs DKK 800–2,000.
Labour
The labour time depends on which pads need replacing and on the saxophone’s construction and condition. On an alto saxophone it typically takes:
- Replacement of individual pads on a modern alto saxophone without major faults: ½–3 hours per pad
- Replacement of 5–8 pads on a modern alto saxophone without major faults: 4–8 hours
- Complete repad of a modern alto saxophone without major faults and without cleaning the instrument: 8–15 hours
- Complete repad of a traditional alto saxophone with some wear: 15–25 hours
My prices (2026)
With my hourly rate of DKK 600, this gives the following guideline prices for the labour:
- Replacement of individual pads on a modern alto saxophone without major faults: approx. DKK 300–1,800 per pad
- Replacement of 5–8 pads on a modern alto saxophone without major faults: approx. DKK 2,400–4,800
- Complete repad of a modern alto saxophone without major faults and without cleaning the instrument: approx. DKK 4,800–9,000
- Complete repad of a traditional, worn alto saxophone: approx. DKK 9,000–15,000
On top of this come the pads. A complete repad therefore typically ends up at approx. DKK 5,600–11,000 incl. pads for a modern alto saxophone and approx. DKK 9,800–17,000 for a traditional, worn alto saxophone. So it is rarely the pads, but the labour and the condition of the saxophone, that have the greatest impact on the price.
Sources
* Examples of saxophone workshops in Denmark and abroad and what they state about prices and labour times (visited October 2026). Prices may have changed since.
- Denmark: Jonas Saxofon
- Denmark: Woodwind Music
- Denmark: i.K. Gottfried
- Sweden: Musikgaraget
- Sweden: Windcorp – full overhaul and minor repairs
- Sweden: Saxofonverkstaden
- Finland: Soitinkorjaamo
- Finland: Parkusjärvi
- Germany: SMG Custom
- Germany: Hilbert Holzblasinstrumente
- Germany: Saxophonic
- Netherlands: Happy Woodwinds
- Netherlands: Harry Bakker Muziek
- Netherlands: ExtraMuziek
- France: Sax Machine Paris
- France: Atelier du Chat Luthier
- France: Le Temps des Soufflants
- France: Cordes et Vents
- England: Headwind Music
- USA: Ward-Brodt Music
- USA: Horn Repair
- USA: JL Woodwind Repair
- USA: Quinlan & Fabish
- USA: The Boston Sax Shop
Does your saxophone need new pads?
It costs nothing to have your saxophone looked over. With a free condition check I assess whether the pads actually need replacing – and give you a specific estimate of price and time. My workshop is in Odense V.